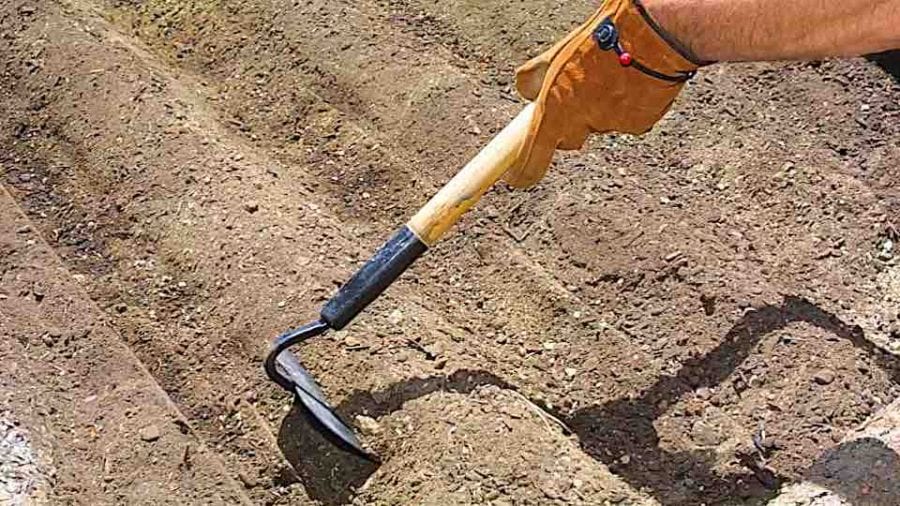
In order to hoe a garden row, you will need a few tools and some patience. First, you will need to find a hoe that is the right size for you. Next, clear the area where you will be working by removing any rocks or debris.
Once the area is clear, use the hoe to make furrows in the soil. Be sure to make the furrows deep enough so that your seeds or plants will have room to grow. Finally, water the furrows and then wait for your plants to sprout!
- Gather your materials
- You will need a hoe, gloves, and water
- loosen the soil with the hoe by pushing it back and forth across the row of dirt 3
- break up any clumps of dirt or roots you come across 4
- remove any rocks or debris from the row 5
- once the row is loose, level it out with the hoe 6
- give the row a final watering
How to Make Rows in a Garden by Hand
If you’re anything like me, you love the satisfaction of a job well done. And what better way to achieve this than by making rows in your garden by hand? Not only is it a great workout, but it also gives you a sense of accomplishment that comes with knowing you did it yourself.
Plus, it’s just plain old fun!
Here’s how to do it:
1. Choose your spot.
Pick an area of your garden that gets plenty of sun and has good drainage. Then, clear away any rocks or debris that might get in the way.
2. Make a mark.
Using a stick or something similar, make a line down the length of your chosen spot. This will be your guide for making straight rows.
3. Start digging!
Use a spade or hoe to dig a trench along the marked line. The depth and width of the trench will depend on what you’ll be planting (consult your seed packet for guidance). Just make sure it’s big enough so that your plants have room to grow roots without being cramped.
4. Fill ‘er up! Once you’ve dug the trench, fill it back in with soil and give it a good pat down so everything is nice and level. If there are any low spots, add more soil until everything is evened out again.
5 Repeat steps 2-4 until all of your rows are complete!
Garden Row Maker
Looking to start a garden, but not sure where to start? A garden row maker is a great tool to help you get your garden started quickly and easily. This tool helps you create evenly spaced rows for planting, so all you have to do is drop in your seeds or plants and go!
There are a few different types of garden row makers on the market. Some are manual tools that you push through the soil to create your rows. Others are attachments that you can add to a tiller or other power tool.
No matter which type you choose, using a garden row maker is an easy way to get perfectly straight rows for your garden.
When choosing a garden row maker, consider the size of your gardening area and how many rows you need to create. There are also different widths available, so be sure to select one that will work well with the plants you’re planning on growing.
Garden row makers are relatively inexpensive, so it’s easy to find one that fits both your needs and budget.
If you’re looking for an easy way to get perfectly straight rows for your garden, then consider using a garden row maker. This simple tool will save you time and hassle when starting your next gardening project!
Garden Row Tool
Garden Row Tool is a tool that helps you create evenly spaced rows in your garden. It is made of two pieces of PVC pipe with holes drilled in them. You put the pipes together and then use string or twine to tie them at the desired width apart.
This tool is great for creating rows for planting seeds, bulbs, or transplants. It can also be used to mark the edges of pathways or other areas in your garden.
How to Row a Garden With a Tractor
If you’re lucky enough to have a tractor, then you know that this versatile piece of machinery can be used for all sorts of things – including rowing your garden. Here’s how to do it:
1. First, hook up the implements that you’ll need for rowing.
This includes the plow, harrow, and roller. Consult your tractor’s manual to ensure that you’re attaching everything correctly.
2. Next, clear out any obstacles in your garden area – stones, sticks, etc.
You don’t want anything getting in the way of the rowing process.
3. Now it’s time to actually start plowing and harrowing your garden bed. Begin at one end and slowly make your way down the length of the bed, making sure to cover all areas evenly.
4. Once you’re finished with the plowing and harrowing, use the roller to flatten out the surface of the bed. This will make it easier to plant seeds or set out transplants later on.
5. And that’s it!
You’ve now successfully rowed your garden using a tractor – congratulations!
Garden Rows Or Mounds
When it comes to gardening, there are two popular methods for planting – rows or mounds. So, which is the best method for you? It really depends on a few factors, such as the size of your garden and the type of plants you’re growing.
Here’s a closer look at both methods to help you decide which will work best for your garden:
Rows:
– If you have a large garden, rows are probably the way to go.
They make it easy to keep track of your plants and ensure that each one gets enough space and sunlight.
– Rows also make watering and fertilizing easier, since you can just run a hose or spread fertilizer down the length of the row.
– On the downside, weeds can be more difficult to control in rows since they have plenty of open space to grow in.
You’ll need to be diligent about pulling them by hand or using herbicides.
How to Make Garden Rows With a Tiller
If you’re looking to start a garden, one of the first things you’ll need to do is create some garden rows. This can be done easily with a tiller. Here’s how:
1. First, mark out where you want your garden rows to be. You can do this with string or by simply using a stick to draw lines in the soil.
2. Next, position your tiller at one end of the row and turn it on.
3. Slowly guide the tiller down the row, letting it do its work. As you go, keep an eye on the depth of the blades – you don’t want to go too deep and damage roots that are already in place.
Repeat steps 2-4 until all of your rows are complete!
Hoss Row Maker
In Hoss Row Maker, players take on the role of farmers trying to make the best use of their land. The game is played over a series of rounds, with each player taking turns placing buildings on their farm. The goal of the game is to have the most valuable farm at the end of the game.
To start the game, each player gets a starting amount of money and a hand of cards. On your turn, you can either buy a card or play a card. If you buy a card, you add it to your hand and pay its cost.
If you play a card, you place it in front of you and follow its instructions. Each card has different effects, but they all generally fall into one of three categories: buildings, animals, or crops.
Buildings are permanent structures that provide some benefit to your farm.
Animals produce food that can be sold for money or used to feed your other animals. Crops must be planted in rows and harvested in order to sell them for money. There are also special event cards that can shake up the game by giving everyone new goals or changing the rules temporarily.
The key to success in Hoss Row Maker is figuring out how to best utilize your limited resources. Money is important for buying new cards and upgrading your buildings, but if you spend all your money early on then you won’t have anything left when it comes time to harvest your crops. Similarly, food is necessary for keeping your animals alive but if you produce too much then it will go bad before you can sell it.
Balancing these two needs is essential for winning the game!
Credit: grownbyyou.com
What is the Best Way to Orient Garden Rows?
There are a few things to consider when orienting garden rows, such as the amount of sun exposure and wind protection desired. The most common way to orient garden rows is north to south, so that plants get even sun exposure throughout the day. This is especially important for plants that need a lot of sun, like tomatoes and peppers.
East to west orientation is also an option if you want your plants to get more morning sun and less afternoon sun. Another thing to consider is wind protection. If your garden is in an area that gets a lot of wind, you might want to orient the rows east to west so that the plants are protected from the wind by each other.
What is the Easiest Way to Make Rows in a Garden?
If you’re looking for an easy way to make rows in a garden, one option is to use a rototiller. A rototiller can quickly create evenly spaced rows in your garden bed. Be sure to mark out the area where you want your rows to be before you begin tilling.
Another easy option for making rows is to use a hoe or spade to manually create furrows in the soil. You can then use something like a string or ruler to help keep your furrows straight as you work down the length of your garden bed.
How Do You Mound a Garden Row?
When you mound a garden row, you are essentially creating a raised bed. This is typically done by mounding soil in the center of the row, which creates a berm (or mini hill). This helps to warm the soil earlier in the season and also allows for better drainage.
Mounding also helps to prevent erosion and can make it easier to work with your plants.
Once you have created your mound, simply plant your seeds or transplants into the soil and water as usual.
How Do You Make a Garden Row With a Shovel?
When it comes to making garden rows, using a shovel is typically the best way to go. Here’s how to do it:
First, you’ll want to mark out where you want your row to be.
You can do this by simply using a stick or piece of string and running it along the ground where you want your row to be.
Once you have your line marked, it’s time to start digging! Start at one end of the line and dig a trench that’s about 6-8 inches deep.
As you dig, make sure the sides of your trench are nice and straight – this will make it easier to fill in later on.
Continue digging until you reach the other end of your line. Once you’re done, use your shovel (or hoe) to level off the bottom of the trench so that it’s nice and even.
Now it’s time to fill in your trench with whatever planting material you’re using. If you’re using seeds, simply sow them evenly along the length of the trench and then cover them up with soil. If you’re transplanting seedlings or plants from pots, space them out evenly along the trench and then gently backfill around them with soil until they’re completely covered.
Firm down the soil gently with your hands so that everything is snugged in nicely.
Once everything is planted, give your row a good watering and then sit back and enjoy watching everything grow!
MAKE PERFECTLY STRAIGHT GARDEN ROWS!
Conclusion
If you’re looking to get your garden started on the right foot, then you need to know how to hoe a garden row. Hoeing is an important step in preparing your soil for planting, and it’s not as difficult as you might think. Here’s a quick guide on how to hoe a garden row.
First, you’ll need to clear any debris from the area where you’ll be hoeing. This includes rocks, sticks, and dead leaves. Once the area is clear, use your hoe to loosen up the top layer of soil.
You want to make sure that the soil is loose enough so that roots can easily penetrate it.
Next, use your hoe to create a furrow in the center of the row. The furrow should be about six inches deep and two inches wide.
Once you’ve created the furrow, fill it with water and let it soak in for a few minutes.
After the water has soaked in, start planting your seeds or plants in the furrow. Make sure that each seed or plant is spaced evenly apart so that they have room to grow.
Once all of your seeds or plants are in place, cover them lightly with soil and water them again.
Now all that’s left to do is wait for your garden to grow!
