As the weather gets colder, you’ll need to take steps to winterize your sprinkler system so it doesn’t get damaged. One way to do this is to use an air compressor. Here’s how:
First, turn off the power to your sprinkler system. Then, locate the main water supply valve and turn it off. Next, find the bleed valves on each zone of your sprinkler system and open them up.
Once all the water has been drained from the lines, close the bleed valves.
Now it’s time to hook up your air compressor. Connect one end of the hose to the compressor and the other end to the “blow out” port on your sprinkler system.
Turn on the compressor and let it run until all of the water has been blown out of the lines.
Once that’s done, disconnect the air compressor and close up any openings on your sprinkler system (e.g., valve boxes, drain plugs). You can now safely store away your sprinkler system for winter!
- Shut off the water to your sprinkler system at the main valve
- Drain all of the water from the pipes in your sprinkler system by opening up each of the sprinkler heads and allowing the water to drain out
- Use an air compressor to blow air through the pipes in your sprinkler system in order to remove any remaining water
- Be sure to start from the end of the pipe that is farthest away from where the air compressor is connected
- Close off each of the individual Sprinkler heads with a cap or plug so that no dirt or debris can enter them while they are not being used
- Store any hoses or other components of your sprinkler system in a dry, protected area until they are needed again in springtime
Winterize Sprinkler System Without Air Compressor
If you live in an area where the winters are cold, you know that one of the most important things you can do to protect your home is to winterize your sprinkler system. This process involves draining all the water from the pipes so that they don’t freeze and burst. While it’s a fairly simple process, it does require an air compressor in order to blow out all the water.
If you don’t have access to an air compressor, there are still ways you can winterize your system effectively.
The first step is to turn off the power to your sprinkler system at the main breaker. Next, locate all of the valves for your system and turn them off.
Once the valves are off, open each one so that any remaining water can drain out. Finally, use plugs or caps to seal off each valve so that no water can get back in.
With these steps, you’ll be able to winterize your sprinkler system without an air compressor.
Just be sure to check all of your connections before turning the power back on in spring!
How to Connect Air Compressor to Sprinkler System
If you’re looking to connect an air compressor to a sprinkler system, there are a few things you’ll need to do first. First, make sure the air compressor is properly grounded. Next, determine the correct size and type of piping needed to connect the two systems.
Finally, install a check valve between the air compressor and the sprinkler system to prevent backflow.
Once you have all of your materials ready, follow these steps to connect your air compressor to your sprinkler system:
1. Turn off power to both the air compressor and the sprinkler system.
2. Use pipe dope or teflon tape on all threaded connections before assembly. This will help ensure a tight seal and prevent leaks.
3. Assemble the piping from the air compressor to the check valve, then from the check valve to the sprinkler system using fittings as needed.
Make sure all connections are tight.
Sprinkler System Winterization Kit
Sprinkler system winterization is a process that helps protect your sprinkler system from freezing temperatures and damage. By properly winterizing your sprinkler system, you can avoid costly repairs and keep your lawn looking its best.
There are a few different ways to winterize your sprinkler system, but the most common method is to use a winterization kit.Winterization kits typically include an air compressor and an adapter that attaches to your garden hose. To use the kit, simply connect the air compressor to the adapter and then turn on the compressor. The compressed air will then blow any water out of the sprinkler lines, preventing them from freezing and bursting.
Another way to winterize your sprinkler system is to drain all of the water out of it manually. This can be done by turning off the water supply to the sprinklers and then opening each valve one at a time until all of the water has been drained out. Once all of the water has been drained, be sure to close all of the valves tightly so that no new water can enter the system.
Whichever method you choose, be sure to follow all instructions carefully in order to avoid damaging your sprinkler system. With a little bit of care, you can keep your lawn looking green all year long – even during those cold winter months!
Rent Air Compressor for Sprinkler Blowout
If you’re like most people, the last thing on your mind as autumn sets in is your sprinkler system. But if you want to avoid costly repairs come spring, it’s important to winterize your sprinklers before the first freeze. One of the best ways to do this is to rent an air compressor and use it to blow out any water that might be left in the lines.
Here’s a step-by-step guide to blowing out your sprinklers with an air compressor:
1. Turn off the water supply to your sprinkler system. This is usually done at the main shut-off valve near where the water line enters your property.
2. Connect one end of a garden hose to the “bleeder” or “drain” valve on your lowest zone valve, and open the valve until all of the water has drained from that zone. Repeat this process for each zone in your system.
3. Once all of the zones have been drained, disconnect all of the hoses from their respective valves and remove any remaining water by opening up each valve and allowing it to drain completely.
4. With all of the valves open, attach one end of your air compressor hose to the quick connect fitting on the compressor itself, then turn on the power switch and allow it to build up enough pressure (usually around 40 psi).5
5. Begin at whichever zone is farthest away from where your air compressor is located, and hold down firmly on both ends ofthe quick connect fitting while pressing down onthe leverto release a burstofair into eachzone’s piping (you may need someone else topress downonleverfor you while youholdboth endsofquickconnectfitting). Workyourway backtowardsthecompressoruntilallofthezoneshavebeenpurgedofwater(it’shelpfultomarkoffeachzonewhenyoufinishblowingitout).
6
How to Make a Sprinkler Blowout Adapter
If you have a lawn sprinkler system, you know that it’s important to winterize it before the cold weather hits. This involves blowing out the water from the pipes so they don’t freeze and burst. You can do this yourself with a little know-how and the right tools.
One of the most important tools you’ll need is a sprinkler blowout adapter. This attaches to your garden hose and allows you to hook up your air compressor. With the adapter in place, you can turn on your compressor and let it run until all the water is forced out of the pipes.
Making your own adapter is actually quite simple. You’ll need a few supplies from your local hardware store, including:
-A length of PVC pipe (1/2″ diameter works well)
-A PVC coupling (1/2″ diameter)
-A garden hose thread x NPT thread fitting (1/2″ diameter)
+Teflon tape
To put everything together, start by wrapping some teflon tape around the threads of the fitting. Then screw it onto one end of the PVC pipe. Next, take the coupling and do the same thing – wrap with teflon tape and screw onto the other end ofthe pipe.
That’s it! Now just attach your garden hose to one side ofthe coupling and your air compressor hose tothe other side,andyou’rereadytogo!
Otherwiseyou risk damagingthepipes or fittingsby trappingair inside themunder pressure. Onceeverythingis turned on,lettherunningcompressordo its jobuntil waterstopscomingoutofallofthesprinklersheadsinyourlawn(usuallythis takes15-20 minutes).Whenyou’refinishedblowingoutyour systemforwinter,justdisconnecteverythingandstoreyouradapterinacool dry placeuntil nextspring!
What Size Compressor for Blowing Out Sprinklers
If you’re wondering what size compressor you need to blow out your sprinklers, there are a few things to consider. The size of your compressor should be based on the volume of air that it can deliver, and this is typically measured in cubic feet per minute (CFM). The CFM rating will tell you how much air the compressor can deliver over a period of time, so it’s important to choose a compressor with a high CFM rating if you want to be able to blow out your sprinklers quickly.
In general, you’ll need about 4 CFM for each nozzle on your sprinkler system.
Another thing to consider is the pressure rating of the compressor. This is typically measured in pounds per square inch (PSI), and it tells you how much pressure the compressor can generate.
The higher the PSI rating, the more powerful the compressor will be. For most home sprinkler systems, you’ll need a compressor with a pressure rating of at least 90 PSI.
Finally, make sure to choose a durable compressor that’s designed for heavy-duty use.
Look for one with an oil-free pump, which will require less maintenance than a traditional pump. And make sure the tank is big enough to hold enough air to blow out all of your sprinklers without needing to be refilled frequently. A good rule of thumb is to choose a tank that’s at least 5 gallons in size.
Sprinkler System (Blowout Adapter)
A sprinkler system is a great way to keep your lawn healthy and green. But, like any other type of irrigation system, it needs some occasional maintenance. One important task is winterizing your sprinkler system.
This involves draining all the water out of the pipes so they don’t freeze and burst over the winter months.
One easy way to do this is with a blowout adapter. This is a fitting that attaches to your garden hose and allows you to blow air through the sprinkler lines.
The air will push all the water out of the lines so they can be stored away for the winter without worry.
If you have a large lawn, you may need more than one adapter to get all the air through the lines. And, if you have a particularly long run of pipe, you may need an compressor to help move the air through (this is usually not necessary for most home systems though).
Once you have everything hooked up, simply turn on the water at the main valve and then open up each individual zone valve until water starts flowing out of them. Then, go back and turn off each valve one by one until they are all closed again. Once everything is turned off, open up the blowout adapter and let ‘er rip!
The air will flow through the pipes and push all of the water out. You may want to put an old towel or something under where the adapter is attached just in case there’s any residual water that comes out when you’re done.
When you’re finished blowing out each line, close up the blowout adapter and disconnect it from your hose.
Then store it away until next spring when you’ll need it again!
How to Winterize a Sprinkler System With Backflow Preventer
If you have a sprinkler system with a backflow preventer, it’s important to winterize it before the cold weather sets in. Here are some simple steps to follow:
1. Turn off the water supply to your sprinkler system.
This is usually done at the main shut-off valve near your water meter or at the backflow preventer itself.
2. Drain all of the water from your sprinkler lines by opening up each valve and allowing the water to run out until it is no longer coming out of the nozzle.
This will allow any remaining water in your system to drain out completely. 4. Finally, close the bleed screw and turn off any power to your sprinkler system (if applicable). You may also want to cover any exposed pipes with insulation or a tarp for extra protection against freezing temperatures.
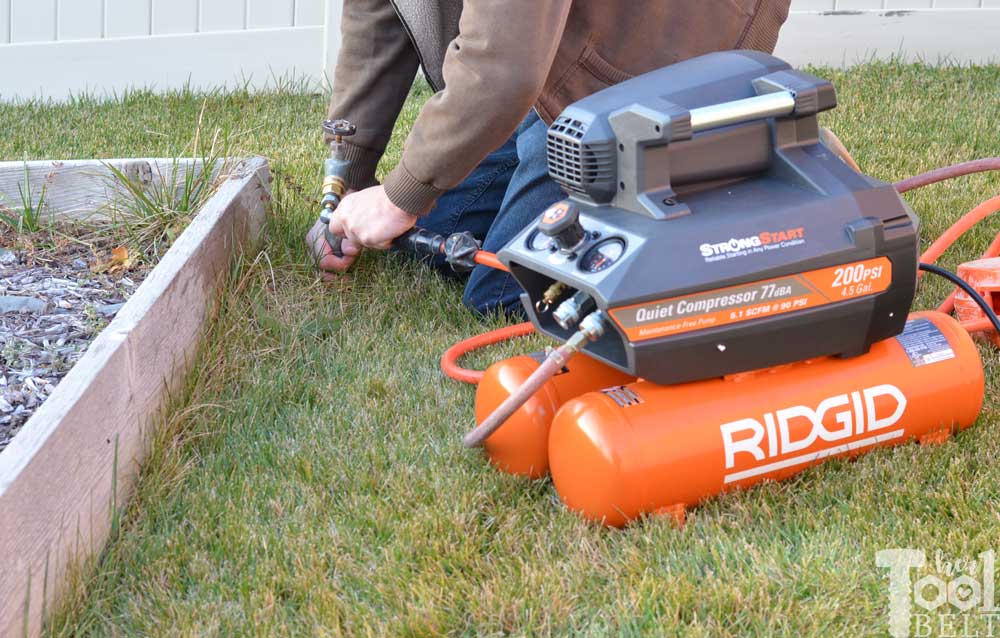
Credit: www.hertoolbelt.com
How Big of an Air Compressor Do I Need to Winterize Sprinklers?
If you want to winterize your sprinklers, you will need an air compressor that can hold at least 30 gallons. This will allow you to pressurize the system and prevent freezing. You may also need a special adapter to connect the air compressor to the sprinkler system.
How Much Psi Do I Need to Winterize My Sprinkler System?
If you’re planning on winterizing your sprinkler system, you’ll need to know how much psi (pounds per square inch) of pressure to use. The amount of psi needed will vary depending on the type of system you have and the climate in which you live.
For most systems, a good rule of thumb is to use around 40-60 psi when blowing out your lines.
This is usually enough pressure to remove any water that may be left in the pipes and prevent them from freezing and cracking during the winter months.
If you live in an area with very cold winters, you may need to use a higher pressure to completely remove all the water from your system. In these cases, it’s best to consult with a professional before winterizing your sprinklers.
How Do I Winterize My Sprinkler System With a Small Air Compressor?
If you have a small air compressor, you can winterize your sprinkler system by following these steps:
1. Turn off the water to your sprinkler system and drain all of the water from the pipes.
2. Attach your air compressor to the “bleeder” valve on your sprinkler system and open the valve.
This will allow compressed air to enter the system and push any remaining water out of the pipes.
3. Close the bleeder valve and disconnect the air compressor.
4. Turn on the water to your sprinkler system for a few seconds to flush any debris out of the pipes.
5. Turn off the water again and drain all of the water from the pipes once more.
Where Do I Put My Air Compressor in My Sprinkler System?
If you’re looking to add an air compressor to your sprinkler system, there are a few things to keep in mind. First, you’ll need to determine the correct size and type of air compressor for your needs. Once you have the right model, you’ll need to choose a location for installation.
When it comes to sizing, it’s important that your air compressor can handle the volume of water your sprinkler system uses. If your system is on the larger side, you may need a two-stage or even a three-stage air compressor. These models offer more power and can provide enough pressure for even the most demanding systems.
As far as location goes, it’s generally best to install your air compressor near the point of use. This way, there will be less pressure drop over distance and your system will operate more efficiently. If possible, try to place the unit in a cool and shaded area to help extend its lifespan.
With these tips in mind, finding the perfect spot for your new air compressor should be a breeze!
Winterize Sprinklers With Air Compressor | EASY Step by Step for Beginners!
Conclusion
Assuming you have a sprinkler system in your yard, there are a few things you can do to winterize it using an air compressor. First, turn off the water to the system and then open each valve or head to allow any water left in the lines to drain out. Next, use compressed air to blow out any remaining water from the pipes.
Be sure to do this in short bursts so you don’t damage the system. Finally, close all of the valves and heads and store them away until spring.