If you want to learn how to use a clamp meter on welding machine, then you’ve come to the right place. In this blog post, we’ll walk you through the basics of using a clamp meter and explain how it can be used on welding machines. After reading this post, you should have a better understanding of how to properly use a clamp meter.
- Turn off the welding machine and disconnect it from the power source
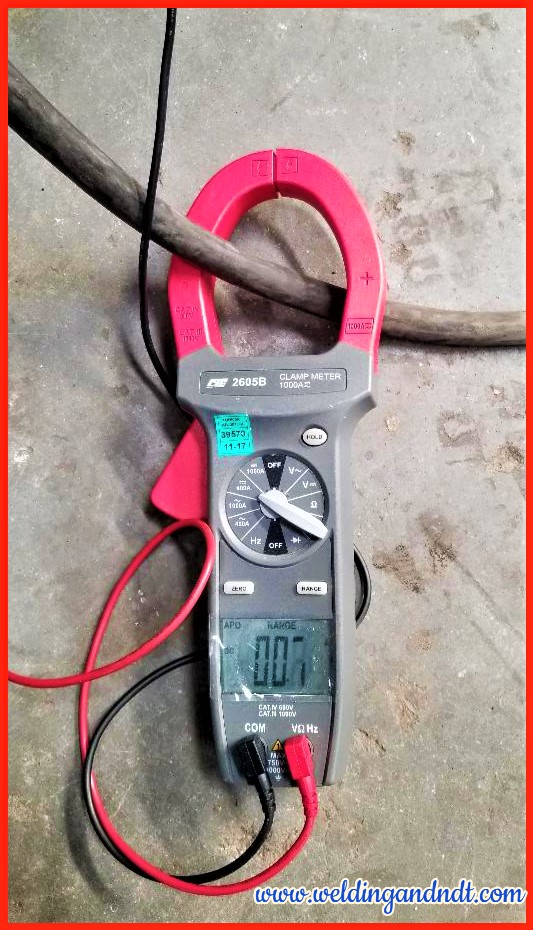
- Use the clamp meter to measure the current flowing through the welding machine’s cable
- The current should be within the range specified in the welding machine’s manual
- If the current is too high, turn off the welding machine and adjust the output accordingly
- If the current is too low, increase the output until it is within range
How to Test Welding Machine
If you’re thinking about a career in welding, or even if you’re just curious about how welding machines work, it’s important to know how to test them. Welding machines are used to join two pieces of metal together, using heat and pressure. The strength of the weld depends on the machine itself and the settings that are used.
Here’s a step-by-step guide on how to test a welding machine: 1) Inspect the machine before use. Make sure that all of the parts are in good condition and that there are no loose wires or other potential hazards.
2) Set up the machine according to its instructions. This will usually involve attaching an electrode holder and ground clamp to the correct areas of the machine. 3) Connect the power supply and turn on the gas supply (if required).
4) Select the correct amperage and voltage for your project. 5) Strike an arc by touching the electrode to the metal surface and then quickly moving it away. The arc should be between 1/8″ – 3/16″ long.
If it is too long or short, adjust the amperage accordingly. 6) Begin welding by moving the electrode along the joint at a steady pace while maintaining consistent contact with both pieces of metal.
Welding Machine Calibration Procedure Pdf
Welding machine calibration is critical to ensuring the quality of your welds. There are many factors that can affect the accuracy of your welding machine, so it’s important to regularly calibrate your machine to ensure that it is performing at its best. There are a few different ways to calibrate your welding machine.
The most common method is to use a standard known as the E6010 electrode. This electrode is used to produce a consistent arc length and voltage, which makes it ideal for calibrating your welding machine. To calibrate your welding machine using the E6010 electrode, you’ll first need to set up the electrode holder and ground clamp.
Next, connect the positive lead of the welder to the holder, and then connect the negative lead to the ground clamp. Finally, strike an arc between the electrode and ground clamp, and adjust the current according to manufacturer’s specifications. It’s important to note that you should only use genuine E6010 electrodes for this procedure; using other types of electrodes can result in inaccurate calibration readings.
How to Test Welder Output
If you’re interested in testing a welder’s output, there are a few things you’ll need to do. First, you’ll need to gather a few supplies including a welding rod, a ground clamp, and some scrap metal. Next, you’ll want to set up your welder according to the manufacturer’s instructions and make sure it’s properly grounded.
Once everything is in place, you’re ready to start welding! To test the welder’s output, simply strike an arc on the scrap metal and begin welding. If everything is working properly, you should see the weld pool forming and the rod melting into the metal.
If you don’t see these things happening or if the weld looks poor, it’s likely that there’s an issue with the welder’s output. It’s important to remember that proper welding technique is also necessary for good results. Be sure to practice before attempting any critical welds!
Arc Welder Output Voltage
An arc welder is a machine that uses electricity to heat up two pieces of metal so that they can be joined together. The welder then uses a electrode to create an arc between the two pieces of metal. This arc heats up the metal and causes it to melt, which allows the two pieces to be joined together.
The output voltage of an arc welder depends on the specific model and brand of machine. However, most machines have an output voltage range of 20-40 volts.
Can You Test a Welder With a Multimeter
Welding is a process of joining two pieces of metal together by heating the metal until it melts and then cooling it so that it forms a strong bond. Welders use electricity to create heat, and they need to be able to control the amount of heat they generate in order to create a successful weld. A welder can use a multimeter to test his or her welding machine and ensure that it is working properly.
A multimeter is an instrument that measures electrical current, voltage, and resistance. It can be used to test a variety of electrical devices, including welding machines. To test a welder with a multimeter, the welder will first need to set the multimeter to the appropriate setting.
Then, the welder will need to connect the positive lead from the multimeter to the positive terminal on the welding machine and connect the negative lead from the multimeter to the ground terminal on the welding machine. The welder should then turn on the power switch on the welding machine and observe the reading on the multimeter. The reading should be within an acceptable range for current, voltage, and resistance; if not, there may be an issue withtheweldingmachine that needsto be addressed.
By using a multimeter, welders can quickly and easily test their welding machines before beginning any projects. This helps ensure that welders are ableto produce quality workmanshipand avoid any potential safety hazards associated with using defective equipment .
How to Calibrate Welding Machine
Welding machines are an essential piece of equipment for any welder. But, like any other machine, they need to be properly maintained and calibrated to ensure optimal performance. Here’s a quick guide on how to calibrate your welding machine:
First, check the manufacturer’s instructions to see if there are any specific calibration procedures that need to be followed. If not, you can proceed with the following steps. 1) Clean all connections and terminals on the welding machine.
This will help ensure accurate readings during calibration. 2) Adjust the output power of the welding machine to its highest setting. 3) Use a multimeter to measure the voltage at the electrode holder connection point.
The reading should match the setting on the welding machine (e.g., if it’s set to 30V, that’s what you should read on your multimeter). 4) Adjust the current output of the welding machine until you get a reading on your multimeter that matches the recommended value for your electrode type and wire size (this information can be found in your Owner’s Manual or online). For example, if you’re using 0.035″ diameter electrodes, you would want an output current of between 70-140 amps.
5) Once everything is properly set, weld a few test beads onto a scrap piece of metal to make sure everything is working correctly. And that’s it! By taking some time periodically to calibrate your welding machine, you can help keep it running smoothly and prevent any issues down the road.
Welding Machine Voltage And Current
Welding machines are used in a variety of industries to join two pieces of metal together. The process involves using an electric current to heat up the metal so that it melts and can be fused together. The strength of the weld is determined by the amount of current that is passing through the metal.
The higher the current, the stronger the weld will be. However, too much current can cause the metal to overheat and break. The voltage of a welding machine determines how much power is being supplied to the machine.
A higher voltage means more power and a higher chance of overheating the metal. Too low of a voltage can result in a weak weld. It is important to find the right balance between voltage and current when welding.
The best way to do this is to experiment with different settings on your welding machine until you find what works best for your project.
Credit: www.weldingandndt.com
How Do You Check Amps on a Welding Machine?
If you’re a welder, sooner or later you’ll need to know how to check the amps on your welding machine. Amperage is a measure of the electrical current flowing through the welding arc. It’s important to know because it has a direct effect on the quality of your welds.
Too much amps and your welds will be over-penetrated; too little and they’ll be under-penetrated. There are two ways to check the amps on a welding machine: with an ammeter or by using the machine’s digital display (if it has one). To use an ammeter, first make sure that it is properly calibrated.
Next, attach the ammeter in line with the welding circuit (i.e., between the power source and electrode holder). Finally, strike an arc and take a reading. Alternatively, if your machine has a digital display, simply strike an arc and read the amp value displayed on the screen.
This method is generally more accurate than using an ammeter.
Where Do You Clamp When Welding?
When welding, you need to clamp the metal in place so that it doesn’t move. There are a few different ways to do this, and which one you use will depend on the project you’re working on. If you’re welding two pieces of flat metal together, you can clamp them along the edges.
If you’re welding a pipe or other round object, you can clamp it in a vise or similar device. If you’re working on something that’s too large to fit in a vise, you’ll need to use clamps specifically designed for welding; these have jaws that grip the metal firmly without marring it. Wherever possible, try to clamp the metal as close to the weld joint as possible.
This will give you more control over the weld and help prevent warping.
How Do You Test a Welder With a Multimeter?
If you’re thinking about a career in welding, or are already a welder, you’ll need to know how to test a welder with a multimeter. This is an important skill because it allows you to ensure that your welding machine is functioning properly. It’s also a good way to troubleshoot problems with your machine.
There are two main ways to test a welder with a multimeter. The first is by checking the continuity of the circuit. To do this, you’ll need to set your multimeter to the “continuity” setting and touch the probes to the two contact points on the welder (the electrode holder and ground clamp).
If the circuit is complete, you should see a reading on the display. If there’s no reading, then there’s an open circuit somewhere and you’ll need to find and fix it before continuing. The second way to test a welder with a multimeter is by measuring the amperage output.
To do this, you’ll need to attach the positive lead of your multimeter to the electrode holder and the negative lead to ground. Then, set your multimeter to the “amps” setting and weld for 30 seconds at 1/4″ intervals. After 30 seconds, check the reading on your multimeter – it should be within 10% of the rated amperage output of your machine.
If it’s not, then there’s something wrong with your machine and you’ll need to have it serviced or repaired.
How Do You Calibrate a Welding Machine?
Welding machines are critical tools in any metalworking shop. A welder that isn’t properly calibrated can produce subpar welds, which can lead to expensive repairs down the road. But with a little time and effort, you can ensure that your welding machine is always operating at peak performance.
The first step in calibrating a welding machine is to check the manufacturer’s specifications. These will tell you what the ideal voltage and amperage settings should be for your particular machine. Once you have these numbers, you can begin adjusting the settings on your machine accordingly.
Next, you’ll need to test your machine’s output using a voltmeter and an ammeter. These devices will help you determine whether or not your welding machine is outputting the correct amount of power. If it’s not, simply adjust the settings until it is.
Finally, once you’ve confirmed that your welding machine is outputting the proper amount of power, it’s important to test its accuracy by making some practice welds on scrap metal. This will allow you to see firsthand whether or not your calibration efforts have paid off. By following these simple steps, you can be sure that your welding machine is always performing at its best.
Clamp meter – How to check Volts when welding
Conclusion
If you’re a welder, then you know that a clamp meter is an essential tool. But what do you need to know in order to use one properly? Here’s a quick guide:
First, make sure that the jaws of the clamp meter are clean and free of debris. Then, open them up and position them around the welding cable. Once they’re in place, close the jaws tight.
Now it’s time to take a reading. First, select the appropriate mode on the clamp meter (AC or DC). Then, hold down the “read” button and observe the display.
The number that appears is your welding current in amps. That’s all there is to it! Using a clamp meter is easy once you know how.
Just be sure to follow these simple steps and you’ll be taking accurate readings in no time.