If you’re using a Dewalt impact driver and need to remove the drill bit, there are a few things you need to do. First, make sure that the chuck is in the locked position. Next, use an allen wrench to loosen the set screw on the side of the chuck.
Finally, unscrew the drill bit from the chuck.
- Begin by unplugging the Dewalt impact driver from any power source
- Next, use a hex key to loosen and remove the chuck from the impact driver body
- With the chuck removed, you should now be able to see and access the drill bit that is stuck inside
- Use a pair of pliers or a drill bit extractor tool to grab onto the stuck drill bit and remove it from the impact driver
- Once the drill bit has been removed, reassemble the Dewalt impact driver by reversing the steps above
How to Put Drill Bit in Dewalt Impact Driver
If you’re looking for a way to put a drill bit in your Dewalt impact driver, here’s a quick and easy guide. First, make sure that the bit is compatible with the model of impact driver you have. Next, insert the bit into the chuck of the impact driver.
Once it’s locked into place, simply start drilling!
Drill Bit Stuck in Impact Driver
If you’ve ever had a drill bit get stuck in your impact driver, you know how frustrating it can be. Here’s a quick guide on how to remove a stuck drill bit from an impact driver.
First, try using a pair of needle-nose pliers to grab the end of the drill bit and pull it out.
If that doesn’t work, you can try using a hammer to tap on the end of the drill bit (be careful not to hit the chuck of the impact driver). This may help loosen the grip of the drill bit so you can remove it.
If neither of these methods work, your next best bet is to use an extractor set designed for removing stuck screws and bolts.
Simply insert the extractor into the chuck of the impact driver and turn it counter-clockwise until it grabs onto the drill bit. Then, follow the instructions that come with your particular extractor set in order to remove the drill bit from your impact driver.
How to Remove Bit from Milwaukee Impact Driver
If you’re looking for a way to remove a bit from your Milwaukee impact driver, there are a few different methods you can try. The first is to use the tool’s release button. This is usually located near the base of the tool.
Simply depress the button and pull the bit out.
Another method is to use an allen wrench or hex key. Insert the allen wrench or hex key into the chuck and turn it counterclockwise until the bit releases.
You may need to apply some pressure while turning in order to loosen the grip on the bit.
Finally, if neither of these methods work, you can always try using a pair of pliers. Grip the end of the bit with the pliers and twist until it comes loose from the chuck.
Be careful not to damage eitherthe bit orthe chuck while doing this.
Dewalt Impact Driver Chuck Adapter
If you’re in the market for a new impact driver, you may be wondering if the Dewalt Impact Driver Chuck Adapter is worth your investment. Here’s everything you need to know about this adapter to help you make your decision.
The Dewalt Impact Driver Chuck Adapter is an accessory that allows you to use standard drill bits with your impact driver.
It’s a quick and easy way to expand the capabilities of your impact driver, and it’s very reasonably priced.
The adapter is made from high-quality materials, and it’s very easy to use. Simply insert the adapter into the chuck of your impact driver, and then insert a standard drill bit into the adapter.
You can then use the impact driver to drill holes just like you would with a regular drill.
The Dewalt Impact Driver Chuck Adapter is a great way to expand the capabilities of your impact driver. It’s well-made, easy to use, and very affordable.
If you’re looking for an adapter that will allow you to use standard drill bits with your impact driver, this is definitely the one you want!
How to Remove a Stuck Bit from a Makita Impact Driver
If you’ve ever had a stuck bit in a Makita impact driver, you know how frustrating it can be. The good news is that there is a relatively easy way to remove a stuck bit from your Makita impact driver. Here’s what you need to do:
1. Start by unplugging the Makita impact driver from any power source.
2. Next, use an appropriate sized hex wrench to loosen the chuck collar screw located on the back of the unit.
3. With the chuck collar screw loosened, you should now be able to twist and remove the stuck bit from the chuck jaws using your fingers or pliers.
4. Once the stuck bit has been removed, re-tighten the chuck collar screw and plug your Makita impact driver back in to continue using it as normal.
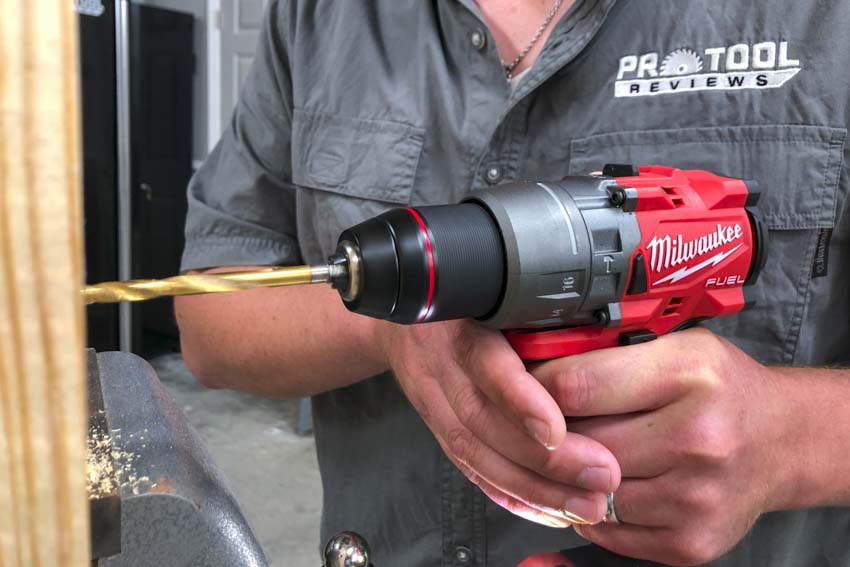
Credit: www.protoolreviews.com
How Do You Unlock a Dewalt Drill Bit?
If you’re looking for information on how to unlock a Dewalt drill bit, you’ve come to the right place. In this article, we’ll give you a step-by-step guide on how to do just that.
First things first, let’s take a look at what you’ll need in order to unlock your drill bit.
You’ll need a few tools, including:
• A Phillips head screwdriver
• A flathead screwdriver
• A hammer (optional)
With these tools in hand, follow the steps below to unlock your Dewalt drill bit.
1. Use the Phillips head screwdriver to remove the two screws that secure the chuck key holder (the black plastic piece) to the back of the drill.
2. With the chuck key holder removed, use the flathead screwdriver to pry out the locking pin (the metal piece with a small hole in it).
3. Once the locking pin is removed, you should be able to twist and pull out the drill bit that’s locked into place. If it’s stuck, tap it lightly with a hammer until it comes loose.
And that’s it! Now you know how to unlock a Dewalt drill bit.
How Do You Change the Drill Bit on a Dewalt 20V Max Impact?
Assuming you would like a step-by-step guide on how to change the drill bit on a Dewalt 20v Max Impact:
To remove the drill bit, start by holding down the spindle lock button. This is located just above where the chuck meets the body of the drill.
Next, use your other hand to twist the chuck counterclockwise until it loosens and comes off. With the chuck removed, you should be able to see the drill bit that is currently inserted. Grab hold of this bit and pull it straight out.
Now that the old drill bit has been removed, it’s time to insert a new one. Begin by finding a replacement drill bit that fits snugly into the chuck. Once you have found a compatible bit, insert it into the chuck and tighten by twisting clockwise until snug.
Be careful not to overtighten as this could damage boththe chuck andthe drillbit. Finally, release the spindle lock button and your new drillbit should be ready for use!
How Do I Get a Small Drill Bit Out of My Impact Driver?
If you’re looking for a way to remove a small drill bit from your impact driver, there are a few things you can try. First, try using a pair of pliers to grip the drill bit and pull it out. If that doesn’t work, you can also try using a magnet to remove the drill bit.
Finally, if all else fails, you can always take the impact driver apart and remove the drill bit that way.
Bit Broken and Stuck in Dewalt Impact Drill (SOLVED)
Conclusion
If you’re looking for how to remove a drill bit from a Dewalt impact driver, then this article is for you. Impact drivers are great tools for drilling into tougher materials, but they can be a bit tricky to use. Here are some tips on how to remove a drill bit from a Dewalt impact driver.
First, make sure that the power is off and the drill bit is not spinning. Next, use an allen wrench to loosen the chuck until it’s loose enough to remove the drill bit. Finally, pull the drill bit out of the chuck and dispose of it properly.