If you want to know how to mount a wall fan without drilling, then you’ve come to the right place. Mounting a wall fan can be a great way to add ventilation to a room without taking up floor space. However, drilling into your walls can be expensive and time-consuming.
Luckily, there are ways to mount a wall fan without drilling that are just as effective.
- Locate the spot on the wall where you want to mount the fan
- Use a stud finder to mark the location of the studs in the wall
- Place the mounting bracket for the fan on the wall and mark the locations of the holes with a pencil
- Drill pilot holes at each marked location and insert wall anchors if necessary
- Screw the mounting bracket to the wall using screws that are long enough to penetrate into a stud
- Hang the fan on the bracket and secure it in place with any included hardware
Wall Fan Plug-In
A wall fan is a great way to cool down your home during the hot summer months. However, before you can use your wall fan, you need to plug it in. Here is a step-by-step guide on how to do just that:
1. Find an outlet that is close to where you want to install your wall fan. If possible, choose an outlet that is on a dedicated circuit so that the fan does not trip the breaker when it is turned on.
2. Using a screwdriver, remove the plate from the outlet and set it aside.
3. Take a look at the wiring inside the outlet box. You should see three wires: a black wire (hot), a white wire (neutral), and a green wire (ground).
4. Using wire strippers, strip about ½ inch of insulation off of each end of the black and white wires.
5. Take the black wire and attach it to one of the brass screws on the side of the plug (this will be your hot connection). Then take the white wire and attach it to one of the silver screws on the side of the plug (this will be your neutral connection).
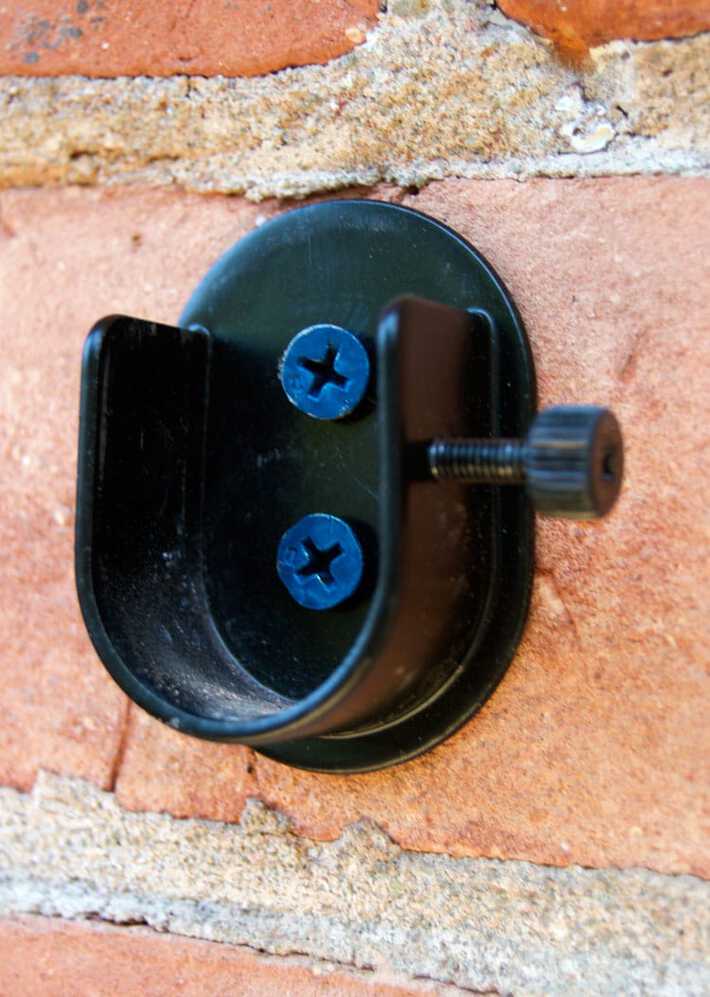
Replacement Wall Mount Fan Bracket
Replacement Wall Mount Fan Bracket
If your wall mount fan bracket has seen better days, it may be time to replace it. Fortunately, this is a relatively easy process that most people can do themselves.
Here’s what you need to know about replacing a wall mount fan bracket.
What You’ll Need:
– A replacement wall mount fan bracket (obviously)
– A drill
– Screws (the type and size will depend on the model of fan and bracket)
– A screwdriver or drill bit that fits the screws
Assuming you have all of the necessary tools, installing the new bracket is fairly simple. First, remove the old bracket by unscrewing it from the wall. If there are any paint or debris buildup on the screws, use a wire brush or similar tool to clean them off so they come out easily.
With the old bracket removed, hold up the new one in its place and mark where you need to drill holes for the screws. Drill pilot holes at these marks, then screw in the new bracket using the provided screws (or your own if they’re a different size). That’s it!
Your wall mount fan should now be securely attached to its new bracket.
How to Mount a Floor Fan on the Wall
If you’re looking for a way to save space in your home or office, mounting a floor fan on the wall is a great option. Not only does it free up floor space, but it also ensures that the fan is out of the way and won’t be knocked over. Plus, it looks pretty cool!
Here’s how to do it:
First, find a spot on the wall where you want to mount the fan. Then, using a drill, create two holes in the wall at this location.
Next, insert drywall anchors into the holes. These will help secure the screws that will hold the fan in place.
Now it’s time to actually mount the fan.
Start by attaching one of the brackets that came with your fan to the back of the unit using screws. Then, holding the bracket against the wall, use a drill to drive screws into the drywall anchors. Repeat this process for the other bracket.
Finally, plug in your fan and enjoy!
Pedestal Fan Wall Mount Bracket
When it comes to cooling down a room, many people turn to a trusty pedestal fan. But what if you don’t have any floor space to spare? That’s where a pedestal fan wall mount bracket comes in handy!
A wall mounted pedestal fan is ideal for those who want the cooling power of a pedestal fan without taking up any valuable floor space. These brackets are designed to securely hold your fan at the perfect height for circulating air, and some even come with adjustable settings so you can customize the airflow to suit your needs. Plus, they’re easy to install – simply find a suitable spot on your wall and screw in the bracket (fans are not included).
So if you’re looking for a way to keep cool without sacrificing floor space, consider investing in a pedestal fan wall mount bracket. You won’t be disappointed!
Wall Mounted Fan Height from Floor
When it comes to finding the perfect wall mounted fan for your home, one of the most important considerations is height. After all, you want to make sure that the fan will be effective in providing a cool breeze, but you also don’t want it to be so high up that it’s out of reach.
So, what is the ideal height for a wall mounted fan?Well, it really depends on the specific model and style of fan that you choose. However, as a general rule of thumb, most experts recommend mounting fans at least 7 feet off the ground. This will ensure that the blades are able to generate enough airflow to effectively circulate around the room.
Of course, if you have high ceilings in your home, you may need to adjust this slightly and go with a taller option. But even then, 7 feet should still be considered the minimum height for adequate cooling power. So if you’re looking for optimal results, make sure to keep this in mind when shopping for your next wall mounted fan!
Credit: www.theartofdoingstuff.com
How Do You Hang a Fan on the Wall?
If you want to add a bit of style to your home or office, then consider hanging a fan on the wall. Not only will it help circulate air, but it can also be quite eye-catching. Here’s how to do it:
First, find a stud in the wall using a stud finder. Once you’ve located one, mark the spot with a pencil. Then, use a drill to create pilot holes at the top and bottom of the marked area.
Next, hold the fan up against the wall so that the pilot holes line up with the mounting holes on the back of the fan. Then, use screws to secure the fan to the wall. Make sure they are tight so that the fan doesn’t wobble.
Finally, plug in the fan and enjoy your new stylish addition!
How Do You Mount Without Screws?
There are a few ways to mount without screws, the most common being double-sided tape or Command strips. You can also use putty or Velcro.
Double-sided tape is one of the most popular ways to mount without screws because it’s easy to use and holds well.
All you have to do is peel off the backing and stick it to your wall. Make sure your surface is clean before applying the tape for best results.
Command strips are another popular option and they work in a similar way to double-sided tape.
Just peel off the backing and stick them to your wall. They’re easy to remove and won’t damage your walls when you take them down.
Putty can be used if you need a temporary mounting solution.
It’s not as strong as tape or Command strips, but it will hold for a short period of time. If you need to remove it, just pull it off gently and it should come right off.
It’s easy to apply and remove, and won’t damage your surfaces like putty can. Just be careful not to use too much pressure when removing Velcro so you don’t pull off any paint or wallpaper along with it!
How Do I Convert a Standing Fan to a Wall Fan?
When it comes to electric fans, there are two main types: standing fans and wall fans. While both types of fans serve the same purpose – to circulate air and keep a room cool – they each have their own distinct advantages. Standing fans, for example, are typically more affordable than wall fans and take up less space.
Wall fans, on the other hand, tend to be more powerful and can be used in a variety of different ways (e.g., as an exhaust fan in a bathroom).
So, what if you want the best of both worlds? Is it possible to convert a standing fan into a wall fan?
The short answer is yes, but it’s not as simple as just mounting the fan on the wall. For one thing, most standing fans are not designed to be mounted – they lack the necessary brackets or holes. Additionally, even if you could mount the fan on the wall, it probably wouldn’t work very well since most standing fans are not nearly as powerful as dedicated wall units.
If you’re set on converting a standing fan into a wall fan, your best bet is to purchase a conversion kit. These kits typically include everything you need to properly mount your fan on the wall, including brackets and hardware. Some kits also come with remote controls, which can make operating your new wall fan much easier.
Where Should Wall Fans Be Placed?
Wall fans can be placed in a number of different locations, depending on your needs. If you want to cool down a specific area, like a living room or bedroom, then placing the fan near an open window will help circulate the air and create a refreshing breeze. You can also use wall fans to ventilate a kitchen or bathroom by opening up a window and positioning the fan so it blows the hot air out.
In general, it’s best to place wall fans high up on walls so they’re not in the way and out of reach of small children.
Install a Wall Mount Fan PERFECTLY | Ideal Wall Fan Height From Floor | Wall Mount Fan Fitting
Conclusion
Installing a wall-mounted fan without drilling can be a bit tricky, but it is possible. You will need to use some strong adhesive strips or hooks and make sure that the fan is properly secured before turning it on. Follow these steps and you should be able to install your new fan in no time!