To mount a headache rack without drilling, you will need to purchase the proper mounting hardware. This can be found at most auto parts stores. You will also need to find a suitable location on your vehicle to mount the rack.
- Find the perfect headache rack for your truck
- Place the rack on your truck and mark where you’ll need to drill
- Drill pilot holes into your truck’s bed rail
- Use bolts and washers to secure the rack to your truck
- Drive safely and enjoy your new headache rack!
Back Rack Tool Box Mount
A back rack tool box mount is a great way to organize your tools and keep them within easy reach. There are a few different styles of back rack tool box mounts, so you can choose the one that best fits your needs. The most popular style is the side-mount, which attaches to the side of your truck bed.
This gives you easy access to your tools, while still allowing plenty of room in the bed for other cargo.
If you frequently haul large loads in your truck bed, then a top-mount tool box might be a better option for you. These mounts attach to the top of the bed, freeing up space below.
Keep in mind that you’ll need a ladder or step stool to access your tools when they’re stored this way.
No matter which style of back rack tool box mount you choose, make sure it’s compatible with your particular truck model. Some trucks have specific mounting brackets that must be used in order for the rack to fit properly.
Once you’ve found the perfect mount for your truck, loading it up with all your essential tools will help make every job easier – from fixing a flat tire to building a new deck.
Backrack Installation Kit
If you’re looking to install a Backrack on your vehicle, you’re going to need the proper installation kit. This kit includes everything you need to get the job done right, including all of the necessary brackets, bolts, and instructions. With this kit, you’ll be able to quickly and easily install your Backrack in no time.
Back Rack Installation With Tool Box
If you’re looking to install a back rack on your truck with a tool box, there are a few things you need to know. First, you’ll need to measure the length and width of your truck bed. This will ensure that the back rack is the right size for your vehicle.
Next, you’ll need to determine where you want the back rack to be positioned. Once you’ve done that, it’s time to start drilling holes for the brackets that will hold the rack in place. Be sure to use caution when drilling, as you don’t want to damage your truck bed.
Finally, once the brackets are in place, you can bolt on the back rack and secure it with nuts and bolts. And that’s it! With a little bit of effort, you can easily install a back rack on your truck with a tool box.
Removable Headache Rack
If you’ve ever had a headache, you know how debilitating they can be. And if you’ve ever had a migraine, you know that they can be even worse. But what if there was a way to prevent headaches altogether?
That’s where the removable headache rack comes in.
The removable headache rack is designed to help reduce or eliminate headaches by gently applying pressure to the temples and forehead. It’s simple to use – just attach it to your head with the adjustable straps and let it do its job.
And when you’re not using it, simply remove it and store it away until you need it again.
So if you’re looking for a way to help reduce or eliminate headaches, give the removable headache rack a try!
Back Rack Low Profile Mount Instructions
Assuming you would like a blog post discussing the installation of a low profile back rack:
“Installing a back rack can be daunting, especially if you don’t have much experience with carpentry or home improvement projects. But don’t worry!
We’ll walk you through the process step-by-step so that you can get your new back rack installed in no time.
The first step is to gather your materials. You will need:
• A tape measure
• A level
• A drill
• 1/8″ drill bit
• 3/16″ drill bit (if using lag bolts)
• 1/4″ wrench or socket (if using carriage bolts)
If you are installing on a concrete wall, you will also need: • 1/2″ hammer drill and masonry bit OR impact driver and masonry screws
And if you are installing on drywall, you will need: • Drywall anchors rated for at least 50 lbs.
Back Rack Installation F250
If you’re looking to add a back rack to your F250, the process is actually pretty simple. First, you’ll need to purchase the rack itself. There are a few different options on the market, so take some time to research which one will best suit your needs.
Once you have the rack, it’s time to install it. The first step is to remove any existing racks or crossbars that may be on your truck. Next, using the provided hardware, attach the back rack to your truck’s bed rails.
It’s important to make sure that the rack is secured tightly so that it doesn’t come loose while driving. Finally, test out the rack by adding whatever cargo you plan on carrying and making sure that it’s securely in place. With a little bit of time and effort, you can easily add a back rack to your F250 and be ready for all of your hauling needs!
Back Rack for Truck
If you’re looking for a way to add some extra storage space to your truck, a back rack may be just what you need. A back rack is a platform that mounts on the bed of your truck and provides a flat surface for carrying cargo. They come in a variety of sizes and styles to suit your needs, and can be equipped with crossbars or other features to make loading and unloading easier.
Whether you’re an avid outdoorsman who needs a place to stash gear for camping or hunting trips, or you just need somewhere to keep your tools and supplies safe while transporting them from one job site to the next, a back rack can give you the extra storage space you need. And because they mount on the outside of your vehicle, they won’t take up any valuable space inside the cab where you need it most.
When shopping for a back rack, pay attention to the weight capacity to make sure it will be able to handle the load you plan on carrying.
Also consider whether crossbars or another type of support would be helpful in keeping your cargo secure. And finally, choose a style that complements the look of your truck. With so many options available, there’s sure to be a back rack that’s perfect for you.
Back Rack Uses
A back rack is a versatile storage solution that can be used in a variety of ways. Here are just a few ideas:
-Store gardening tools, such as shovels, rakes and hoes.
-Keep sports equipment organized in one place.
-Use it as additional storage in the kitchen for pots, pans and other cookware.
-Create a home office space by adding a back rack to hold books, files and other supplies.
-Hang towels and linens in the bathroom.
Whatever your needs, there’s a good chance a back rack can help you stay organized and tidy!
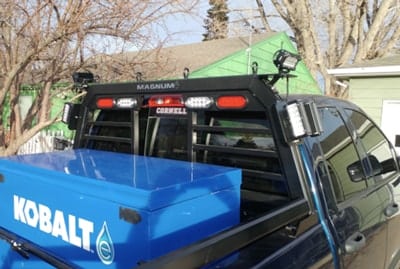
Credit: magnumtruckracks.com
How Do I Bolt down My Headache Rack?
There are many headache racks on the market and the installation process will vary depending on which one you have. However, in general, most headache racks can be installed by bolting them to the bed of your truck. Here are some tips on how to do this:
1. First, make sure that the bolts you will be using are long enough to go through both the headache rack and the bed of your truck. You don’t want them to be too short or they won’t provide a secure connection.
2. Next, position the headache rack where you want it on the bed of your truck and mark where the holes for the bolts need to go.
Drill pilot holes at these marks.
3. Now, thread the bolts through the holes in the headache rack and then through the pilot holes in the bed of your truck. Use washers and nuts to secure them in place.
4. Finally, tighten everything down well so that your headache rack is securely bolted to your truck’s bed!
How is a Backrack Installed?
Installing a BACKRACK is a relatively simple process that can be completed in about an hour. The first step is to determine where the BACKRACK will be mounted on the vehicle. Once the location is determined, the next step is to mark and drill four holes for the mounting brackets.
The brackets are then mounted to the vehicle using nuts and bolts.
The last step is to install the crossbars onto the brackets. The crossbars must be positioned so that they are level and evenly spaced.
Once they are in place, they are secured using set screws. That’s it! Your BACKRACK is now installed and ready to use!
How Long Does It Take to Install a Headache Rack?
It typically takes about two hours to install a headache rack. The first step is to remove the old rack, if there is one. Next, the new rack is put into place and bolted or welded into place.
Finally, the racks are secured with brackets or straps.
Can You Have a Headache Rack And Toolbox?
If you’re thinking about outfitting your truck with a headache rack and toolbox, you might be wondering if the two can go together. The answer is yes! Having a headache rack and toolbox can actually be a great combination.
A headache rack is a great way to protect your cab from shifting cargo in the bed of your truck. It’s also a great place to mount extra lights or even store tools within easy reach. A toolbox, on the other hand, is the perfect place to keep all of your essential tools organized and within reach.
So why not combine the two?
Installing a headache rack with a built-in toolbox can give you the best of both worlds – protection for your cab and convenient storage for your tools. Plus, it can help keep your truck’s bed free from clutter.
If you’re looking for maximum organization and protection for your truck, this is definitely the way to go!
BACKRACK™ Truck Racks – No Drill Installation
Conclusion
If you’re looking to add a headache rack to your truck without drilling, there are a few things you’ll need to do. First, measure the width of your truck’s bed and choose a headache rack that will fit. Next, remove any items from the bed of your truck that might get in the way of installation.
Once everything is clear, line up the headache rack with the bed of your truck and mark where you’ll need to drill holes. With all of your holes marked, drill them out and then mount the headache rack using bolts or screws.