It is surprisingly easy to make a cutting board with only hand tools. With a little bit of time and effort, anyone can create a beautiful and functional cutting board that will last for years. The first step is to select the wood you will use.
For this project, hardwoods such as maple or walnut are ideal because they are durable and resistant to warping. Once you have chosen your wood, cut it into pieces that are about 1 inch thick and 6 inches wide. You will need four pieces for the top and bottom of the cutting board, and two pieces for the sides.
- Use a saw to cut the wood into the desired shape for your cutting board
- Sand the edges of the wood to make them smooth
- Apply a food-safe finish to the cutting board
Jointer
If you’re a woodworker, then you know that a jointer is an essential tool. But what exactly is a jointer and what does it do? In this blog post, we’ll take a closer look at this important tool and explain everything you need to know about it.
A jointer is a woodworking tool that is used to create a smooth, flat surface on a piece of wood. The tool consists of two sharp blades that are mounted on an adjustable base. To use the jointer, you simply place the wood on the blade and run it through.
As the wood passes through the blades, they will cut away any unevenness or roughness, leaving you with a perfectly level surface.
There are many different types of jointers available on the market, but they all serve the same basic purpose. Whether you’re looking for a small handheld model or a large floor-standing version, there’s sure to be a jointer that’s perfect for your needs.
So why should you invest in one of these tools? Here are just some of the benefits:
Achieve professional results: If you want your woodworking projects to have that professional touch, then using a jointer is essential.
With this tool, you’ll be able to create smooth surfaces that look straight out of a factory.
Save time: A good quality jointer can save you hours of sanding time (not to mention elbow grease). By using this tool early on in your project, you can avoid having to do any major corrective work later down the line.
Get better value from your lumber: When buying lumber from suppliers, they often charge more for boards that aren’t perfectly flat and level. However, if you have access to a jointer,you can turn those imperfections into an asset by flattening them out yourself and getting more useable lumber from each board..
Hand Plane End Grain Cutting Board
Assuming you would like a blog post discussing how to make a hand plane end grain cutting board:
Woodworking is a hobby that many people enjoy. One of the most rewarding aspects of woodworking is creating something useful, like a cutting board, with your own two hands.
A hand plane end grain cutting board is not only beautiful, but it’s also durable and practical.
The first step in making a hand plane end grain cutting board is to select the wood. The best type of wood for this project is hardwood, such as maple or cherry.
You’ll need two pieces of hardwood that are at least 1″ thick and 8″ wide. Once you have your lumber, cut it into strips that are 3/4″ wide and 6″ long. These will be the pieces that make up the top and bottom of your cutting board.
Next, arrange the strips on your work surface so that the ends alternate between top and bottom. Then, take another piece of hardwood and cut it into strips that are 3/4″ wide and 12″ long. These will be used for the sides of your cutting board.
To assemble the sides, apply glue to one edge of each strip and then clamp them together so they dry in place overnight.
If you’re using a power planer , set it to remove just 1/32″ of material with each pass . For best results , make several passes over each strip , moving slowly and evenly . If you’re using a handheld block plane , adjust it so that it takes off about 1/16″ per stroke . Again , take your time and move slowly and evenly for best results . Once all four sides have been planned , sand them down with increasingly finer grits until they’re smooth to the touch .
Then , apply glue to one edge of each side piece and clamp them together around the six strips that make up the top and bottom . Allow this assembly to dry overnight before proceeding to the next step . The final step is optional , but if you want an extra-smooth surface on your cutting board , you can use food-safe mineral oil or beeswax as a finish .
Wooden Cutting Boards
Most people think that any cutting board can be used for anything, but that is not the case. Different materials are better for different tasks. For example, wooden cutting boards are great for slicing and chopping fruits and vegetables because they are gentle on knives and provide a stable surface.
Plastic cutting boards, on the other hand, are better for meat because they can be sanitized more easily. Glass cutting boards should be avoided altogether because they dull knives quickly.
When it comes to wooden cutting boards, there are two main types: hardwood and softwood.
Hardwood boards, like maple and walnut, are denser so they resist nicks and cuts better than softwood boards. They also tend to be more expensive. Softwood boards, like pine and cedar, are less expensive but require more care since they can warp or crack if not properly cared for.
To clean a wooden cutting board, simply wash it with hot water and soap then rinse it with clear water. You should avoid using harsh chemicals or scrubbing too vigorously as this can damage the wood. Once it is dry, you can rub mineral oil into the board to help keep it from drying out and to protect it from bacteria build-up.
End Grain Cutting Board Hand Tools
When it comes to cutting boards, there are two main types: edge grain and end grain. Edge grain cutting boards are made by gluing together strips of wood with the grain running horizontally. End grain cutting boards are made by gluing together blocks of wood with the grain running vertically.
End grain cutting boards are often thought to be superior to edge grain cutting boards because they’re less likely to dull your knives. They’re also more forgiving on your knives, meaning that you don’t have to worry as much about chipping or damaging the blades. However, end grain cutting boards can be more expensive than edge grain ones, and they’re also more susceptible to moisture damage.
If you’re looking for a high-quality cutting board that will last you for years, an endgrain board is a great option. Just be sure to take proper care of it and keep it away from moisture when not in use!
Thickness Planer
Assuming you would like a blog post discussing the thickness planer as a woodworking tool:
The thickness planer is one of the most versatile tools in a woodworker’s arsenal. It can be used to create thinner pieces of lumber from thicker boards, or even out the thickness of boards that are not perfectly uniform.
When using a thickness planer, the first step is to select the appropriate blade for the job. There are three main types of blades: straight, spiral, and helical. Straight blades are best for general purpose use, while spiral and helical blades are better suited for specific tasks such as cutting curves or removing large amounts of material quickly.
Once the blade has been selected, it is time to set up the machine. The first thing to do is adjust the height of the cutter head so that it is level with the table. Next, set the depth of cut by turning the knob on the side of the machine.
The depth of cut will determine how much material is removed with each pass of the blade. After setting up the machine, it is time to start feeding lumber through it. Start withthe widest board first and feed it intothe machine slowly and evenlyto avoid any issues with kickback or uneven cuts.
As each board passes throughthe cutter head,it will be trimmed down tothe desired thickness. Dependingon how many boards needto be processedand their overall size,it may takesome timeto complete allof thematerials preparationwith this tool .
Drum Sander
A drum sander is a powerful tool that can be used to sand down wood or other materials. It consists of a cylindrical drum that spins as the user runs it over the surface to be sanded. Drum sanders are very effective at removing imperfections and creating a smooth, even finish.
However, they can also be dangerous if not used properly. Always follow the manufacturer’s instructions when using a drum sander.
Planer
A planer is a tool that is used to smooth out wood. It consists of a blade that is mounted on a bed and can be adjusted to different depths. The blade removes small amounts of wood as it passes over the surface.
Planers are available in both hand-held and bench-top models.
Table Saw
Most woodworkers would agree that a table saw is the heart of any woodshop. It’s an essential tool for making rip cuts, cross cuts, dadoes, and more. But with so many different types and models on the market, it can be tough to know which one is right for you.
In this post, we’ll break down everything you need to know about table saws so you can make an informed decision when it comes time to purchase one for your shop.
First things first: what exactly is a table saw? A table saw is a large stationary power tool that uses a spinning blade to cut materials like wood or composite boards.
The blade protrudes through a slot in the tabletop and is usually operated by push buttons or levers on the side of the machine. Table saws are versatile tools that can be used for a variety of projects, from cabinets and furniture-making to trim work and even deck building.
Now that you know what a table saw is, let’s talk about the different types that are available on the market.
The two most common types are portable and contractor table saws. Portable table saws are smaller in size and usually have folding stands that make them easy to transport from one job site to another. Contractor table saws are larger and heavier duty than portable models but they offer more power and features for serious woodworking projects.
Both types of table saws come in either 10-inch or 12-inch blade sizes – just keep in mind that the larger the blade, the wider your kerf (cut) will be.
Tablesaw blades rotate at very high speeds – typically around 3,000 to 4,000 RPM – so it’s important to choose one with carbide teeth that can stand up to this type of wear and tear.
Credit: www.homedepot.com
Can You Make a Cutting Board Without a Planer?
If you’re looking to make a cutting board without a planer, there are a few things you’ll need to keep in mind. First, you’ll need to find a piece of wood that is the right thickness for your project. The thickness of the wood will determine how deep the cuts will be in your cutting board.
Second, you’ll need to use a router to create the groove for your knife. The router will also be used to create any other decorative features on your cutting board. Finally, you’ll need to sand your cutting board until it’s smooth before adding any finish.
What Tools Do I Need to Make a Cutting Board?
Assuming you would like to make a wooden cutting board, here is a list of tools you will need:
-A saw. You can use a hand saw, circular saw, or miter saw.
Just make sure the blade is sharp so it will create clean cuts.
-A drill. This is used to create pilot holes for your screws.
-A sander. This is used to smooth out the edges of your board and make sure everything is even.
-Wood glue.
This will help hold your boards together while they are drying.
-Clamps. These are used to keep the boards in place while the glue dries.
Make sure you have enough clamps to go around the entire perimeter of the board.
-Screws (optional). These are not necessary, but can provide extra support for your cutting board if you decide to use them.
How Do You Cut Grooves With Hand Tools?
There are a few ways to cut grooves with hand tools, depending on the size and depth of the groove you need.
For shallow grooves, you can use a chisel. First, mark out the area where the groove will go with a pencil or pen.
Then, using a hammer, tap the chisel into the wood at an angle, following your marked line. Keep tapping and moving the chisel along until you’ve reached the other end of the groove.
For deeper grooves, you’ll need to use a router.
Routers come in many different sizes and styles, so it’s important to choose one that is best suited for your project. Generally speaking, however, routers work by spinning a bit at high speeds while you guide it along your marked line. The bit will remove material as it goes, leaving behind a smooth groove.
How Do You Make a Cutting Board Without a Jointer Or Planer?
Assuming you would like a tutorial on how to make a cutting board without using a jointer or planer:
You will need the following materials:
-1×6 boards (at least 3)
-wood glue
-clamps
-sander
-mineral oil (optional)
Instructions:
1. Choose your wood.
You can use almost any type of wood for this project, but harder woods will be more durable and easier to clean. Avoid using treated lumber, as the chemicals could leach into your food.
2. Cut your boards to size.
You’ll need three pieces that are all the same length. If you’re using a table saw, rip the boards so they’re all the same width. If you don’t have access to a table saw, you can ask the hardware store to cut them for you.
3. Glue the boards together. Spread wood glue on one side of each board, then stack them on top of each other with the glued sides facing each other. Clamp them together and let the glue dry for at least an hour before proceeding to the next step.
4. Sand down the edges and surface of your cutting board until it’s smooth to the touch. Pay special attention to any sharp corners or edges that could be dangerous when chopping food.
5.”Finish” your cutting board by rubbing it down with mineral oil (this is optional but recommended).
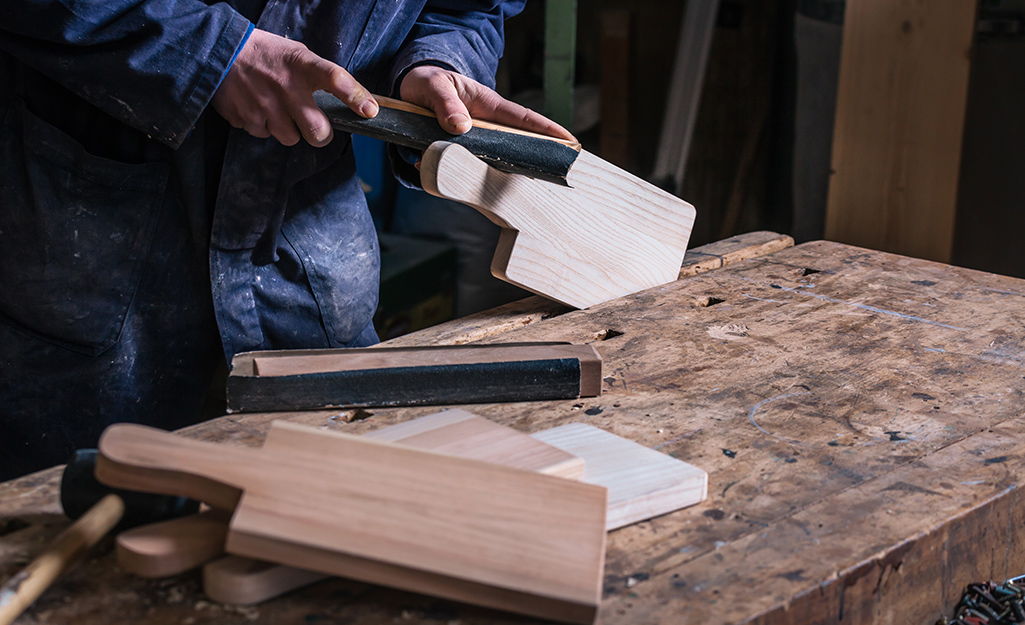
How to Make a Cutting Board with Only Basic Hand Tools
Conclusion
This post walks through the process of making a cutting board using only hand tools. The author begins by finding a suitable piece of wood and marking out the dimensions for the cutting board. Next, they use a saw to cut out the rough shape of the board.
Once the board is cut to size, they use a chisel and plane to smooth out the surface. Finally, they sand the board and apply a finish to protect it from moisture. The whole process takes about an hour or two, depending on the size of the cutting board.