Hoeing is an important part of gardening, as it helps to keep the garden free of weeds and to aerate the soil. There are a few things to keep in mind when hoeing, such as using the right type of hoe for the job and being careful not to damage the plants.
- Select a hoe that is appropriate for the size of your garden rows
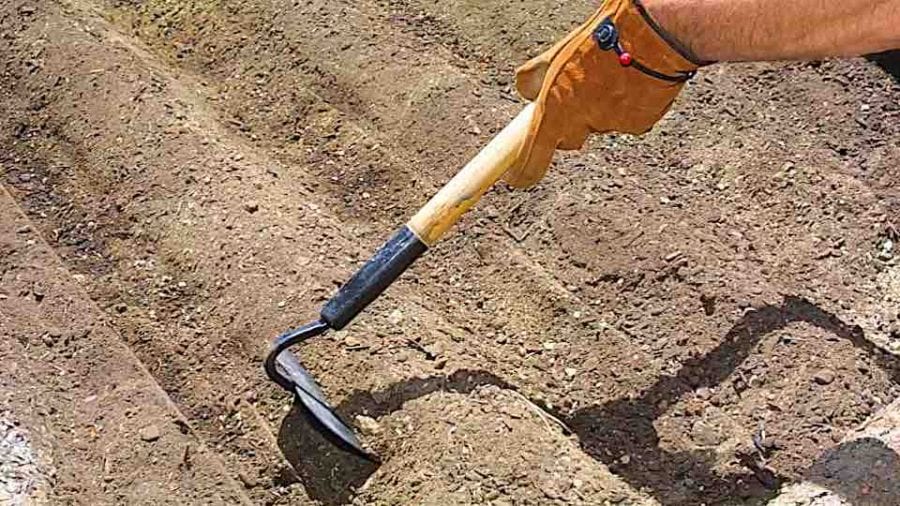
- Place the hoe at the edge of the row that you would like to hoe
- Push the hoe forward, using gentle pressure, until you reach the end of the row
- Lift the hoe and return to the starting point
- Repeat steps 3 and 4 until all desired rows have been hoed
How to Make Rows in a Garden by Hand
If you’re new to gardening, the prospect of making rows by hand may seem daunting. But don’t worry – it’s not as difficult as it looks! Here’s a step-by-step guide to help you get started.
1. Decide on the layout of your garden. This will determine the number and size of the rows you need to create.
2. Mark out the boundaries of each row with string or stakes.
If you’re using string, be sure to stretch it taut so that it’s level with the ground.
3. Use a hoe or other tool to loosen the soil within each row boundary. Be sure to remove any large stones or clumps of dirt that could impede planting later on.
4. Once the soil is loose, use a rake to create evenly spaced furrows (grooves) in each row. The depth of these furrows will depend on what type of plants you’re planning to grow – consult a gardening expert for guidance if needed.
5 .
Finally, smooth out the surface of each row with your rake so that it’s ready for planting!
Garden Row Maker
If you’re a gardener, then you know how important it is to have straight rows. But sometimes, it can be hard to achieve perfectly straight rows without the help of a garden row maker.
A garden row maker is a tool that helps you create perfectly straight rows in your garden.
It’s essentially a long, thin board with markings that help you keep your rows straight. To use one, simply place it in the ground where you want your row to start, and then use it as a guide as you plant your seeds or seedlings.
Garden row makers are especially helpful if you’re planting a large garden.
They can also be used to mark the boundaries of your garden beds, so you know exactly where to stop digging or weeding. And once you’re done using it for the season, simply remove it from the ground and store it away until next year.
So if you’re looking for an easy way to create perfect rows in your garden, grab yourself a garden row maker!
Garden Rows Or Mounds
If you’re new to gardening, you might be wondering whether it’s better to plant your garden in rows or mounds. There are pros and cons to both methods, so it’s important to consider what will work best for you and your garden.
Rows:
– Rows make it easy to keep your plants organized and spaced evenly.
How to Make Rows in Garden With Tractor
Making rows in your garden with a tractor is a great way to get the job done quickly and efficiently. Here are some tips on how to do it:
1. Start by plowing your garden area.
This will loosen up the soil and make it easier to work with.
2. Next, use a disc harrow to break up any clumps of dirt that remain.
3. Finally, use a rototiller to create evenly spaced rows in your garden bed.
4. To make sure your rows are straight, use string or twine to mark out where you want them to be. Then simply follow the line as you drive your tractor back and forth across the garden bed.
How to Make Garden Rows With a Tiller
If you’re looking to start a garden, one of the first things you’ll need to do is create some garden rows. This can be done easily with a tiller. Here’s a step-by-step guide on how to make garden rows using a tiller:
1. First, you’ll need to clear the area where you want to create your garden rows. Be sure to remove any rocks or debris that could potentially damage your tiller.
2. Next, use a measuring tape or ruler to mark out where you want your garden rows to be.
Once you have your measurements, use a hoe or rake to create shallow trenches for your rows.
3. Now it’s time to fire up your tiller! Slowly and carefully drive the tiller down each trench, making sure not to go too deep (you don’t want to damage the roots of your future plants).
4. As you finish up creating each row with the tiller, use a hoe or rake again to smooth out the soil. And that’s it – you’re now ready to plant!
Garden Row Tool
Garden Row Tool
As a gardener, you know that one of the most important things you can do to ensure a successful garden is to keep your rows straight. The best way to do this is with a garden row tool.
There are many different types and brands of garden row tools on the market, so how do you choose the right one for your needs? Here are some things to consider:
1. The size of your garden – If you have a large garden, you’ll need a tool that can cover a lot of ground quickly.
A handheld gardening line marker may not be sufficient. Instead, look for a wheeled or towed model that will allow you to make long, straight lines in fewer passes.
2. The type of soil in your garden – If you have very soft soil, it may be difficult to get a clean line with a traditional metal blade.
In this case, consider using a plastic or nylon cord instead. This will still give you a nice, straight line without damaging delicate roots or leaving ruts in the soil.
Obviously, the more expensive models will offer more features and durability than the cheaper ones. But if you’re just starting out or only have a small garden, there’s no need to spend top dollar on the latest and greatest model.
Diy Garden Row Maker
When you’re ready to start planting your garden, one of the first things you need to do is create rows for your plants. You can do this by hand, but it’s much easier (and faster) to use a garden row maker.
A garden row maker is a tool that helps you create perfectly straight rows in your garden.
It looks like a large hoe, and it has a blade on one end that cuts through the soil. You simply push the garden row maker through the soil to make a furrow, or ditch, for your plants.
Garden row makers come in different sizes, so be sure to choose one that’s appropriate for the size of your garden.
They also have different blade sizes, so you can choose one that will make furrows that are the right size for your plants.
Once you have your garden row maker, setting up your rows is quick and easy. Just follow these steps:
1. Decide how wide you want each row to be and mark out the area with some string or stakes.
2. Start at one end of the marked-out area and push the garden row maker through the soil until you reach the other end. 3. Repeat step 2 until you have as many rows as you need.
4. Fill each furrow with compost or manure and then plant your seeds or seedlings according to package directions.
Credit: grownbyyou.com
What is the Best Way to Orient Garden Rows?
There are a few different ways that you can orient your garden rows, and the best way for you will likely depend on the layout of your garden space. If you have a long, rectangular area to work with, then running your rows north to south will give each plant the most even amount of sunlight throughout the day. This is because the sun will travel across the sky from east to west during the day, so plants positioned in a north to south orientation will get more direct sunlight than those positioned east to west.
However, if your garden space is limited or has odd shapes, then it might make more sense to position your rows in an east to west direction so that they’re easier to reach without having to walk through other planting areas.
Another factor to consider when deciding how to orient your garden rows is wind direction. If you live in an area with strong winds, positioning your rows in a way that blocks the wind can help protect delicate plants from being damaged or blown over.
For example, if winds typically blow from west to east, then planting taller crops along the western edge of your garden and shorter crops along the eastern edge can create a natural windbreak that will shield plants from damage.
What Tool Do You Use to Make Rows in a Garden?
When it comes to making rows in a garden, there are a few different tools that you can use. One popular option is a hoe. This tool is great for making wide, shallow trenches that can be used for planting seeds or small plants.
Another option is a tiller. This tool is perfect for making deeper, narrower trenches – perfect for larger plants or roots. Finally, you could also use a shovel.
This tool is best for making single rows or small areas of planting. No matter which tool you choose, the key is to make sure that your rows are straight and even – this will help your plants grow evenly and produce the best results!
How Do You Make a Garden Row With a Shovel?
If you’re new to gardening, or just need a refresher on the basics, this guide will show you how to make a garden row with a shovel. It’s a simple process that anyone can do, and it’s an essential step in creating a successful garden.
First, find an area in your yard that gets plenty of sunlight and has good drainage.
Then, use your shovel to loosen the soil to a depth of about 8 inches. Next, create a furrow by making a V-shaped groove in the soil with the point of your shovel. The furrow should be about 6 inches wide and as deep as you can make it without going too deep and hitting bedrock.
Once you’ve made the furrow, it’s time to fill it with compost or other organic matter. This will help improve drainage and provide nutrients for your plants. Then, simply sow your seeds or transplants into the furrow and cover them lightly with soil.
Water well and keep the area moist until seedlings emerge.
Making garden rows is easy once you get the hang of it, so don’t be discouraged if your first attempt isn’t perfect. With a little practice, you’ll be able to create neat, evenly spaced rows that are perfect for growing healthy plants!
Garden Rows Without A String Or Hoe
Conclusion
Gardening is a great way to get outside and enjoy the fresh air. One of the most important things to do when gardening is hoeing your garden rows. Hoeing helps to remove weeds and loosen up the soil so that your plants can grow healthy and strong.
Here are some tips on how to hoe garden rows:
1. Start by wetting down the soil with a hose or watering can. This will help to prevent the soil from drying out too quickly as you work.
2. Use a sharp hoe to make clean, straight lines in the soil. You can use a string or ruler to help keep your lines straight.
3. Be sure to rake up any loose dirt or stones as you go so that they don’t end up in your planting holes later on.