Garden hoes are one of the most essential tools for any gardener. They are great for loosening up soil, removing weeds, and aerating your garden beds. But over time, garden hoes can get dull and worn down, making them less effective at doing their job.
If you find yourself in this situation, don’t worry! There are a few easy ways to fix a garden hoe and make it work like new again.
- Examine the garden hoe for any damage or wear
- If there are any cracks or chips in the blade, use a hammer and chisel to repair them
- If the handle is loose, use a wrench to tighten it
- If the hoe is dull, sharpen it with a file or grinder
How to Replace a Garden Hoe Handle
When it comes time to replace a garden hoe handle, there are a few things you need to take into consideration. First, what type of handle do you need? There are two basic types of handles – wood and metal.
Each has its own advantages and disadvantages.
Wooden handles are the most traditional type of handle, and they have a few advantages. They’re generally less expensive than metal handles, and they’re easy to find at most hardware stores.
Wooden handles also tend to be more comfortable to use for extended periods of time.
The main disadvantage of wooden handles is that they’re susceptible to rot and breakage if they’re not properly cared for. Metal handles, on the other hand, are much more durable but can be more expensive.
Once you’ve decided on the type of handle you need, the next step is measuring the old handle so you know what size replacement to buy. Most garden hoes have standard-sized threads, so finding a replacement shouldn’t be too difficult. Once you have the new handle, simply screw it on in place of the old one – easy as that!
How to Make a Hoe Handle
When it comes to gardening, having a quality hoe is important. But even the best hoes can have damaged or worn-out handles. If you find yourself in this situation, don’t worry – it’s easy to make a new hoe handle!
Here’s what you’ll need:
-A length of hardwood (ash is a good option) that’s about 3 feet long and 1 inch in diameter
-A sharp knife
-Sandpaper
-A drill with a 1/2 inch bit
First, use your knife to whittle one end of the hardwood down to a point.
This will be the end that fits into the hoe head. Next, use the sandpaper to smooth out any rough edges on the wood.
now take your drill and create a hole in the center of the other end of the hardwood – this is where your hand will go when using the hoe.
The hole should be big enough for your fingers to fit through comfortably.
Finally, insert the pointed end of the wood into the metal head of the hoe and secure it with two screws. And that’s it – you’ve now got yourself a brand new hoe handle!
Fix Garden Rake
It’s that time of year again. The leaves are falling and your garden needs some attention. But before you can get to work, you need to fix your garden rake.
Here’s how:
1. Inspect the rake for any damage. Look for cracks or splits in the wood, or for missing teeth in the metal tines.
If you find any damage, it’s best to replace the rake rather than try to repair it.
2. Clean the rake thoroughly with soapy water, then rinse it off and dry it completely. This will remove any dirt or debris that could prevent the rake from working properly.
3. Once the rake is clean and dry, add a layer of WD-40 or another lubricant to all of the moving parts (joints, hinges, etc.). This will help keep rust at bay and make sure the rake moves smoothly when in use. 4. Store the rake in a dry place out of direct sunlight when not in use.
This will help extend its life significantly.
Replacing Rogue Hoe Handle
If you’ve ever used a hoe, you know that the handle can sometimes get loose or even break. When this happens, it’s time to replace the handle. Here’s how to do it:
1. Start by removing the old handle. If it’s broken, you may be able to just pull it out. Otherwise, use a screwdriver or similar tool to remove any screws or nails holding it in place.
2. Once the old handle is removed, measure the length of the metal shaft. You’ll need a new handle that’s at least this long.
3. Choose your new handle material.
Wood is traditional, but you could also go with metal or plastic. Just make sure it’s strong enough to withstand some force without breaking.
4 .
Attach the new handle using screws or nails (depending on what type of material you chose). Be sure to drive them in securely so they don’t come loose over time . And that’s it!
Lopper Handle Repair
Your loppers are an important tool in your gardening arsenal, so it’s frustrating when the handles start to come loose. Thankfully, this is a fairly easy problem to fix with some basic supplies. Here’s what you need to know about lopper handle repair.
The first thing you’ll need to do is remove the old handles. This is usually just a matter of unscrewing the bolts that hold them in place. Once the old handles are out, take a look at the ends of the metal shafts.
If they’re damaged or bent, you may need to replace them entirely.
If the shafts are still in good shape, however, you can simply reattach new handles using bolts and nuts. Make sure to use washers on both sides of the connection for added strength.
You can find replacement handles at most hardware stores.
Once your new handles are in place, give them a good testing before putting your loppers away. With proper care and maintenance, your repaired loppers should last for many years to come!
Garden Tool Handles
Garden Tool Handles
Most garden tools have some kind of handle, whether it’s a short one for working in close quarters or a long one for reaching high places. But have you ever stopped to think about the different types of handles available?
Or what kind of handle is best for your needs?
There are three main types of handles used on garden tools: wood, metal, and plastic. Each has its own advantages and disadvantages.
Wooden handles are the traditional choice and are often seen on older tools. They’re strong and durable, but can be heavy. They also require more care than other types of handles – you need to oil them regularly to prevent them from drying out and cracking.
Metal handles are usually made from steel or aluminum. They’re lightweight and don’t require much maintenance, but they can rust if they get wet frequently.
Plastic handles are the most common type nowadays.
They’re usually made from polypropylene or nylon and are very lightweight. They don’t rust or rot, but they can break if they’re dropped or hit against something hard enough.
It really depends on your needs and preferences. If you want a traditional-looking tool that will last for years, go with wood. If you want something light and easy to care for, go with plastic.
How to Replace a Garden Fork Handle
In order to replace a garden fork handle, you will need the following tools: a hammer, a Phillips head screwdriver, and a flathead screwdriver. You will also need replacement handles for your garden fork.
First, use the hammer to lightly tap the end of the garden fork shaft in order to loosen it from the handle.
Next, use the Phillips head screwdriver to remove the screws that are holding the old handle in place. Once the screws have been removed, you can pull off the old handle.
To install the new handle, simply line up the holes on the new handle with those on the shaft of the garden fork.
Then, use either the Phillips head or flathead screwdriver (depending on which type of screws came with your new handles) to secure them in place. Be sure not to overtighten these screws, as this could strip their threads or damage the new handle.
How to Replace a Spade Handle
A spade handle is an important part of the tool and it is necessary to keep it in good shape. Here are a few tips on how to replace a spade handle.
The first thing you need to do is remove the old handle.
This can be done by unscrewing the bolts that hold it in place. Once the old handle is removed, you can measure the length of the new handle so that it will fit correctly.
Next, drill holes into the new handle so that it matches up with the holes on the spade head.
Finally, bolt the new handle into place and tighten all bolts securely. Now your spade should have a brand new, sturdy handle!
Credit: www.gardenstew.com
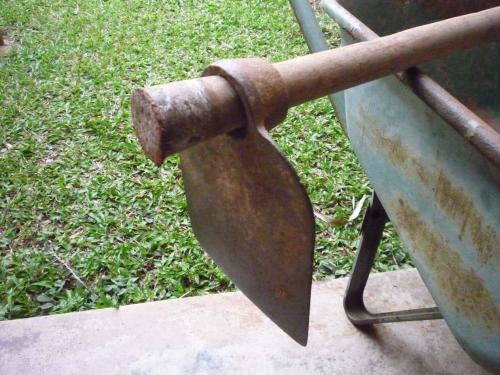
How Do You Attach a Hoe Head?
Assuming you would like instructions on how to attach a hoe head:
Tools needed: Hack saw, file, vise or clamps, wood block, wooden mallet.
1. Place the blade of the hoe in a vise or clamp it down with clamps so that it is secure and won’t move.
2. Using a hack saw, cut off the old hoe head leaving about an inch of metal attached to the blade of the hoe.
3. File down any sharp edges on the metal where you just cut with the hack saw. Be sure to file both sides evenly.
4. Place the new hoe head onto the end of the blade ensuring that it is flush with one side of the blade and extends out past the other side by about an inch or two (this will depend on what size head you are attaching).
5. Clamp down or use a vise to hold both pieces together securely while you work.
6. Take a wood block and place it over top of where the two pieces meet (the goal is to have as much surface area against each piece as possible).
7 Use a wooden mallet (or hammer if necessary) and tap gently but firmly all around where they two pieces meet until they are snugly attached to one another – be careful not to hit too hard or you could crack either piece!
How Do You Fix a Hoe Handle?
A hoe is a gardening tool that is used to dig up soil, weeds and remove debris. The hoe handle is an important part of the tool as it provides the user with a comfortable grip while in use. If your hoe handle becomes damaged or broken, there are a few options for fixing it.
One option is to replace the entire hoe handle. This can be done by purchasing a new handle from a hardware or gardening store. Another option is to repair the existing hoe handle using epoxy glue.
This will require some time and patience, but can be done if you follow the instructions carefully.
If you decide to replace the hoe handle, make sure to measure the length of the old handle before purchasing a new one. It is also important to select a handle that is made from durable materials such as wood or metal.
Once you have your new handle, simply remove the old one and attach the new one in its place using screws or nails.
If you choose to repair your hoe handle using epoxy glue, start by sanding down the area around the break on both sides of the handle. Next, apply epoxy glue to one side of the break and then fit both pieces of the brokenhandle together tightly.
Clamp them together and allow them to dry overnight before using your hoe again.
How Do You Assemble a Hoe?
Hoes are a versatile tool that can be used for weeding, digging and other gardening tasks. They come in various sizes and shapes, but the most common type is the rectangular hoe with a blade at one end and a handle at the other. Assembling a hoe is relatively simple and only requires a few tools.
First, gather the following items: a hoe head, a length of rope or twine, two washers, two nuts and a hammer. If you have purchased a pre-assembled hoe kit, it will likely include all of these items except for the hammer.
Next, place the hoe head on a flat surface with the blade facing up.
Center one of the washers over the hole in the blade and then thread the rope or twine through it. Pull the rope tight so that the washer is snug against the blade, then tie it off in a knot. Repeat this process on the other side of the blade using the second washer.
Finally, screw on each ofthe nuts by hand until they are finger-tight. Usethe hammer to give each nut an extra tap to make sure they are secure. And that’s it!
How Do You Remove a Broken Handle from a Hoe?
If the handle is made of wood, you can use a saw to remove it. If the handle is made of metal, you will need to use a hammer and chisel to remove it.
*EASY* Garden HOE HANDLE Repair
Conclusion
If your garden hoe is starting to show signs of wear, it’s important to take care of it so that it lasts as long as possible. Here are some tips on how to fix a garden hoe:
1. Start by inspecting the hoe for any damage.
If you see any cracks or chips, use a file or sandpaper to smooth them out.
2. Next, apply a thin layer of lubricant such as WD-40 or oil to the metal parts of the hoe. This will help prevent rusting and keep the hoe working smoothly.
3. Finally, sharpen the blade of the hoe using a sharpening stone or file. This will ensure that it can still cut through weeds and soil easily.