If your drill is running out of power quickly, it may be time to charge the battery. You can do this by following these simple steps: first, locate the charging port on the drill and insert the charger. Next, plug the charger into an outlet and wait for the light on the charger to turn green.
Once it does, press the “charge” button on the drill and wait for it to finish charging.
- The first step is to find the right charger for your drill
- Once you have the charger, plug it into an outlet and then into the drill
- Press the power button on the drill to start charging
- Depending on the model of drill, a light will either turn on or flash to indicate that it is charging
- Leave the drill plugged in until it is fully charged, which could take several hours
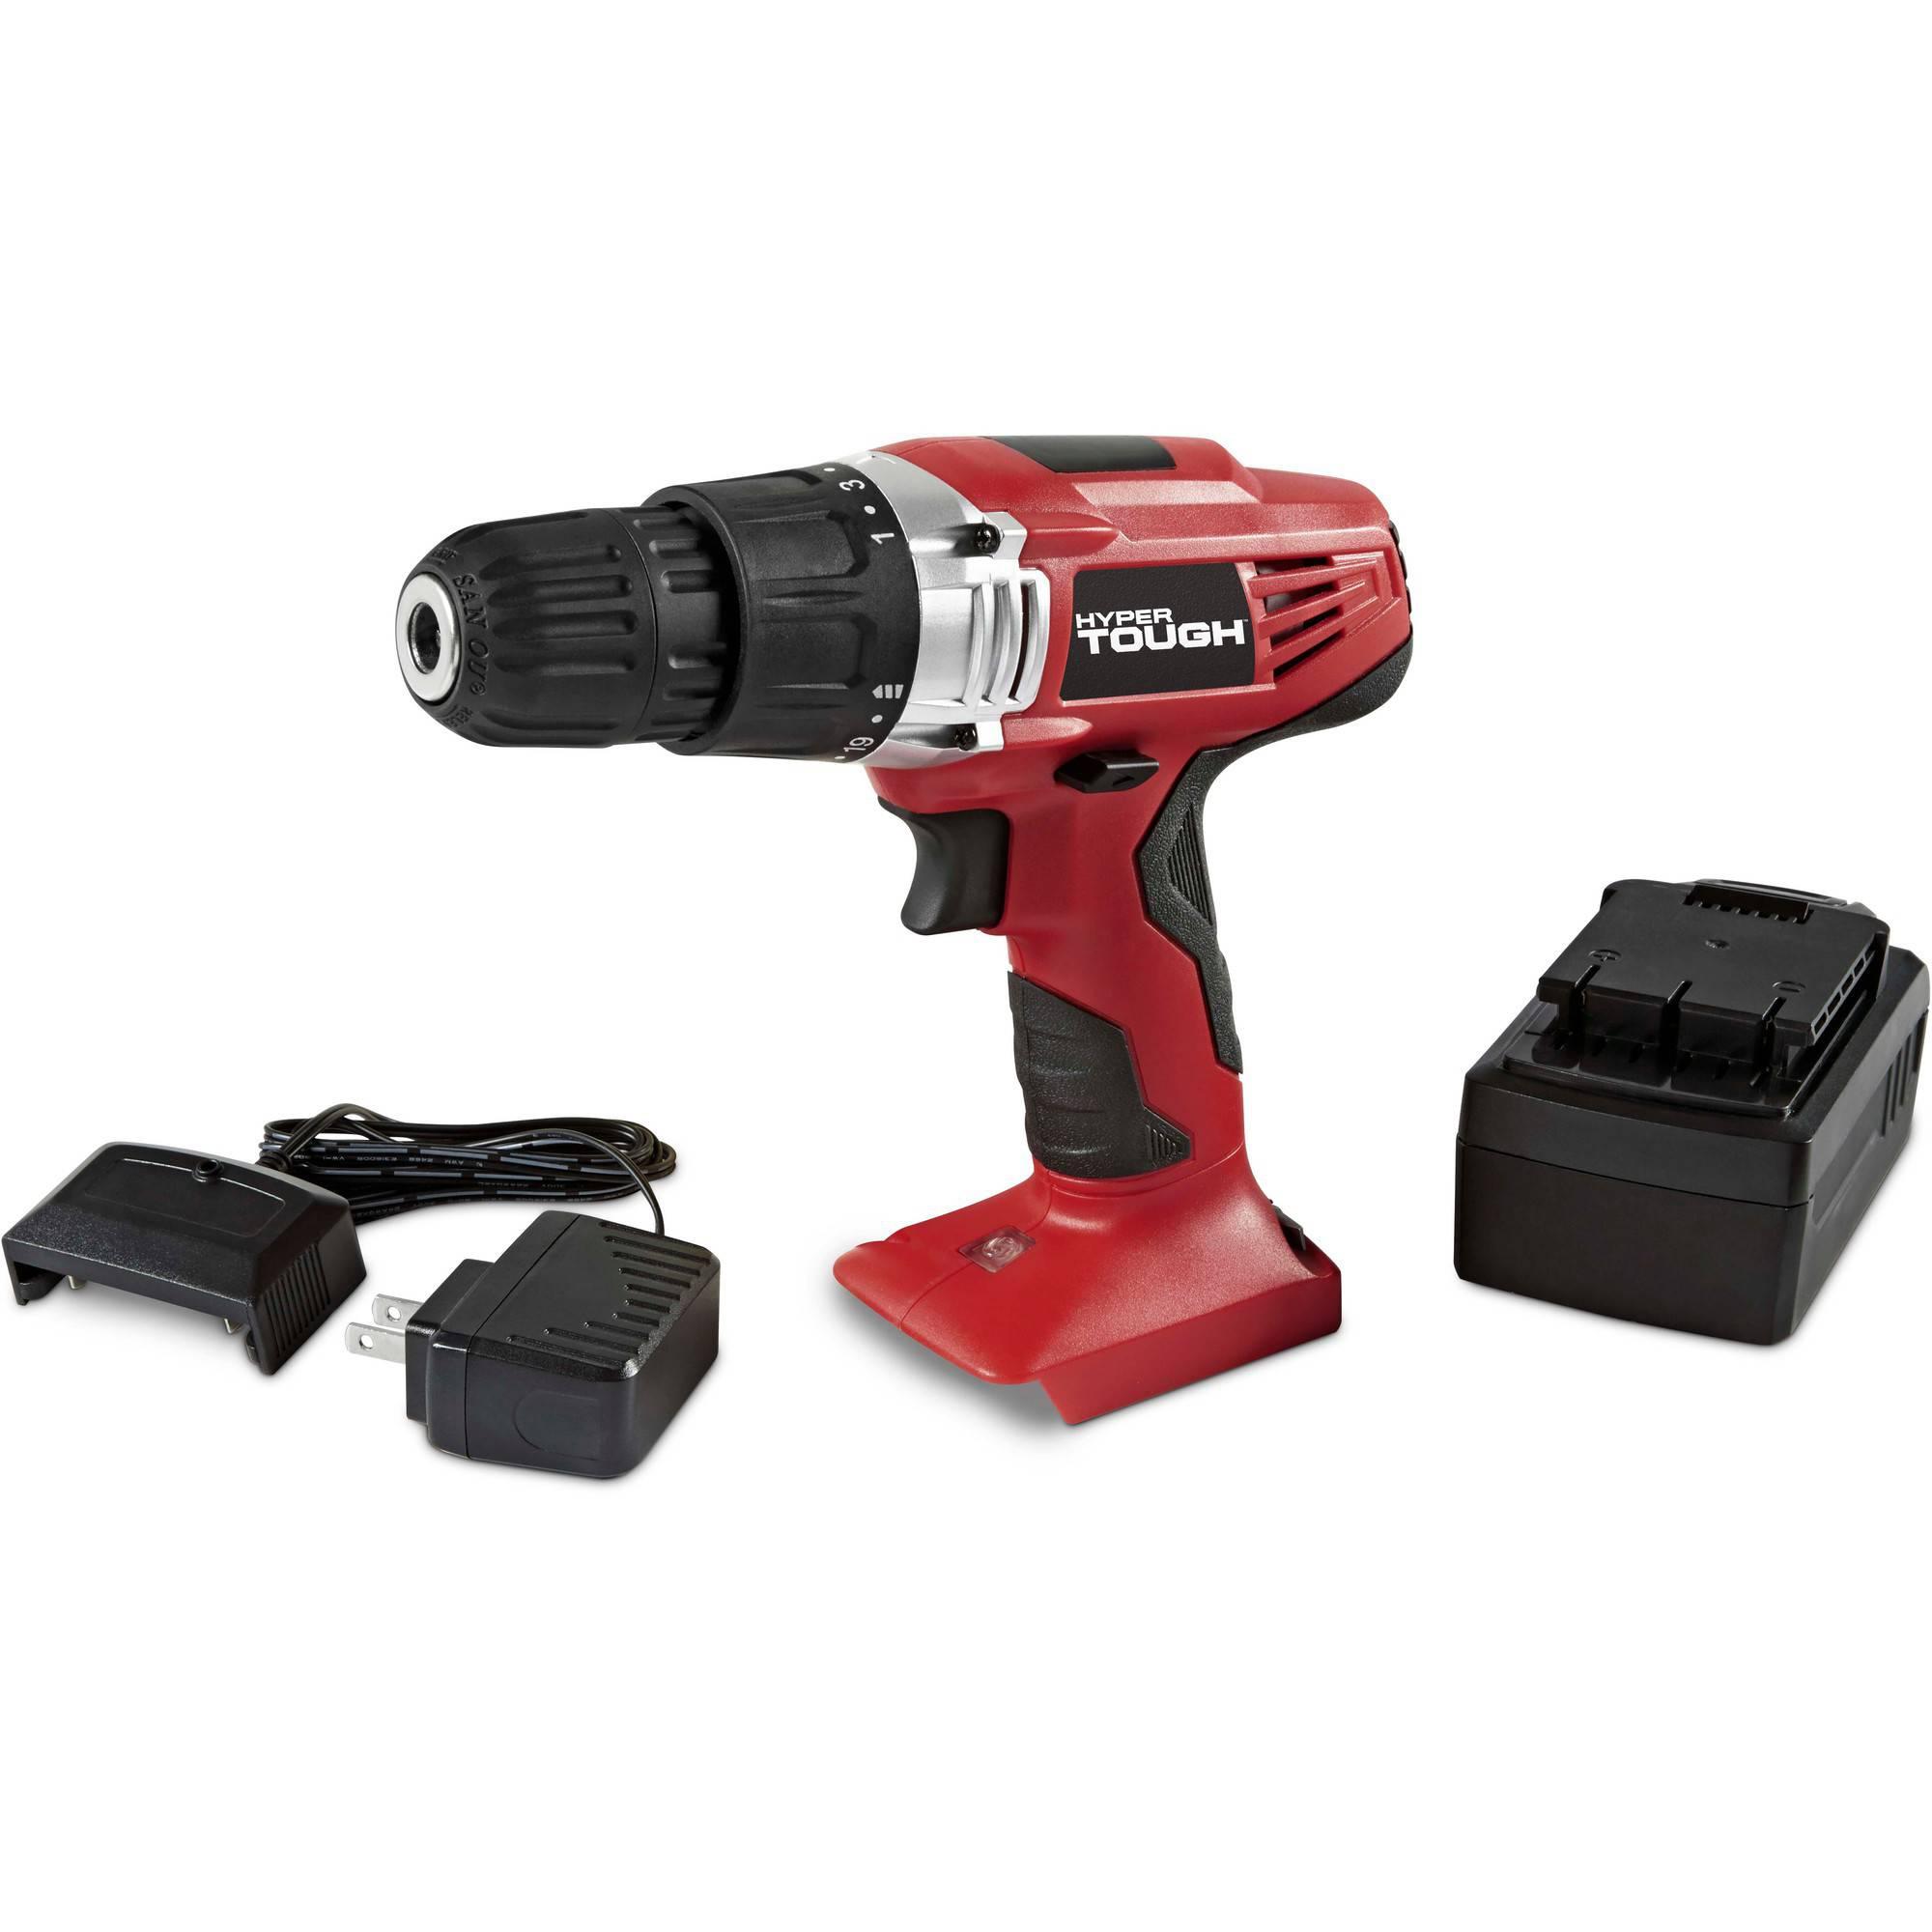
How to Charge Hyper Tough Drill 20V
If you’re looking for information on how to charge a Hyper Tough Drill 20V, you’ve come to the right place. In this blog post, we’ll provide detailed instructions on how to properly charge your drill so that it’s ready to use when you need it.
First things first, make sure that your drill is turned off and unplugged from any power source before beginning.
Once that’s done, locate the charging port on the side of the drill and insert the provided charger. Make sure that the charger is firmly inserted and then plug it into a power outlet.
Once the charger is plugged in, press and hold the charge button (located above the charging port) for 3-5 seconds.
The drill will beep once and the LED light will turn green, indicating that it’s now charging. Depending on how depleted the battery was, it can take anywhere from 1-3 hours to fully charge.
When the battery is fully charged, the LED light will turn from green to blue.
At this point, you can unplug the charger and get back to work!
How to Put Drill Bit in Hyper Tough Cordless Drill
If you’re looking for a how-to guide on putting a drill bit in a Hyper Tough cordless drill, look no further! This comprehensive guide will walk you through the entire process step-by-step so that you can get started drilling holes in no time.
First things first: make sure that your drill bit is the correct size for the job at hand.If it’s too small, it could break or wear down quickly; if it’s too large, it could cause damage to the material you’re drilling into. Once you’ve got the right drill bit, it’s time to get started. 1) With the power turned off, insert the drill bit into the chuck of the drill.
2) Hand-tighten the chuck until it’s snug against the drill bit. You don’t want to over-tighten, as this could damage both the chuck and the drill bit. 3) To ensure that your drill bit is properly secured, test it by trying to pull it out with your fingers while holding onto the chuck with your other hand.
It shouldn’t budge. 4) Now that your drill bit is securely in place, you’re ready to start drilling! Make sure that your workpiece is clamped down (you don’t want it moving around while you’re trying to drilled), then position the tip of the drill bit where you want to make your hole.
5) With everything in position, slowly squeeze trigger of the cordless drill until the spinning action starts. Keep a steady pressure on bothtrigger and workpiece as you begin drilling through material. 6) When you’ve reached desired depth stop squeezing trigger and letdrill come to complete stop before withdrawing from workpiece .
Remove any debris from hole before proceeding .
Hyper Tough Cordless Drill How to Change Bit
If you’re looking for a powerful and affordable cordless drill, the Hyper Tough Cordless Drill is a great option. This drill is ideal for drilling holes in wood, metal, or plastic, and it comes with a variety of bits to get the job done. If you need to change out the bit on your Hyper Tough Cordless Drill, here’s how to do it.
First, remove the battery from the drill. Next, locate the chuck at the end of the drill where the bit is inserted. To loosen the chuck, twist it counterclockwise.
Once loosened, you can remove the old bit and insert a new one. Be sure to tighten the chuck by twisting it clockwise until it’s snug. Reinsert the battery and you’re ready to go!
Hyper Tough Drill Instructions
If you’re looking for a powerful and versatile drill that can handle just about any home improvement project, look no further than the Hyper Tough 20V MAX Cordless Drill. This durable and reliable drill is packed with features that make it perfect for a wide range of applications, including drilling holes, driving screws, and even sanding. And best of all, the Hyper Tough 20V MAX Cordless Drill comes with everything you need to get started right out of the box, including two batteries, a charger, and an accessory kit.
To use your new cordless drill, simply charge the battery using the included charger. Once the battery is charged, insert it into the drill and tighten the chuck to secure it in place. Then select your desired speed using the trigger on the handle – low speeds are great for drilling holes or driving screws into soft materials like wood, while higher speeds are better for tougher tasks like concrete or metal.
For added precision, use the LED work light to illuminate your work area.
When you’re finished with your project, simply remove the battery from the drill and store it in a cool, dry place until you’re ready to use it again. With proper care and maintenance, your Hyper Tough 20V MAX Cordless Drill will provide years of reliable performance.
Hyper Tough Drill Manual
If you’re looking for a durable and affordable drill, the Hyper Tough Drill is a great option. This drill is perfect for household tasks or light-duty projects, and it comes with a variety of features that make it easy to use. The Hyper Tough Drill is also very affordable, making it a great choice for those on a budget.
Credit: toolcraze.net
How Long Does It Take to Charge a Hyper Tough Drill?
It takes about 3-5 hours to charge a hyper tough drill.
How Do You Charge Cordless Drill?
Assuming you would like a blog post discussing how to charge a cordless drill:
“How do you charge cordless drill?”
Most cordless drills will come with a charger and an appropriate battery.
To charge the drill, simply plug the charger into an outlet and then attach the battery to the charger. The light on the charger will typically turn red when the battery is charging and green when it is fully charged. Depending on the size of the battery, it may take several hours to fully charge.
How Do I Know When My Drill is Charged?
Assuming you are talking about a cordless drill, there are a few ways to tell when your drill is charged.
The first way is to check the indicator light on the charger. If the light is green, then your drill is fully charged.
If the light is red, then your drill is still charging.
Another way to tell if your drill is charged is by checking the voltage output of the charger with a voltmeter. Most chargers will have an output of 18 volts when they are done charging a battery.
Finally, you can also try using your drill after it has been plugged in for a while. If it works without any issues, then chances are good that it is fully charged.
How Long Does It Take for a Drill Charger to Charge?
It usually takes around 1-2 hours to charge a drill battery. The time it takes to charge will depend on the type of charger you have and the voltage of the battery. If you have a fast charger, it might only take 30 minutes to an hour to charge your battery.
Best Drill for $20 | Hyper Tough 18-Volt Ni-Cad Cordless
Conclusion
In order to charge a Hyper Tough Drill, one must first locate the charging port on the drill. Next, insert the charging cable into the charging port and then plug the other end of the cable into an electrical outlet. Once the charger is plugged in, a light on the drill will indicate that it is charging.
When the light turns green, the drill is fully charged and ready to use.